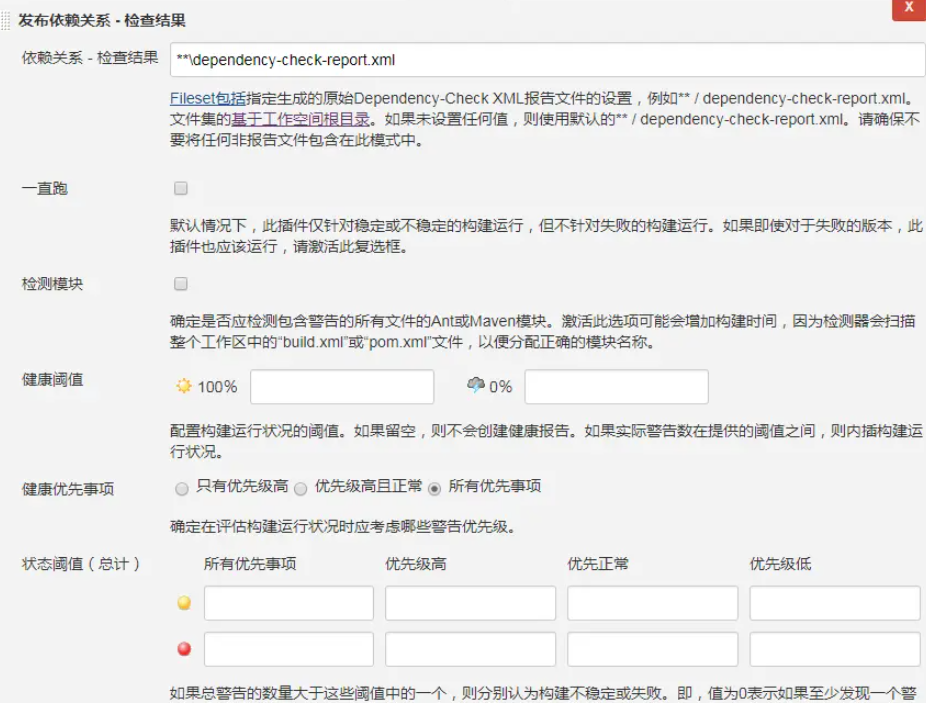
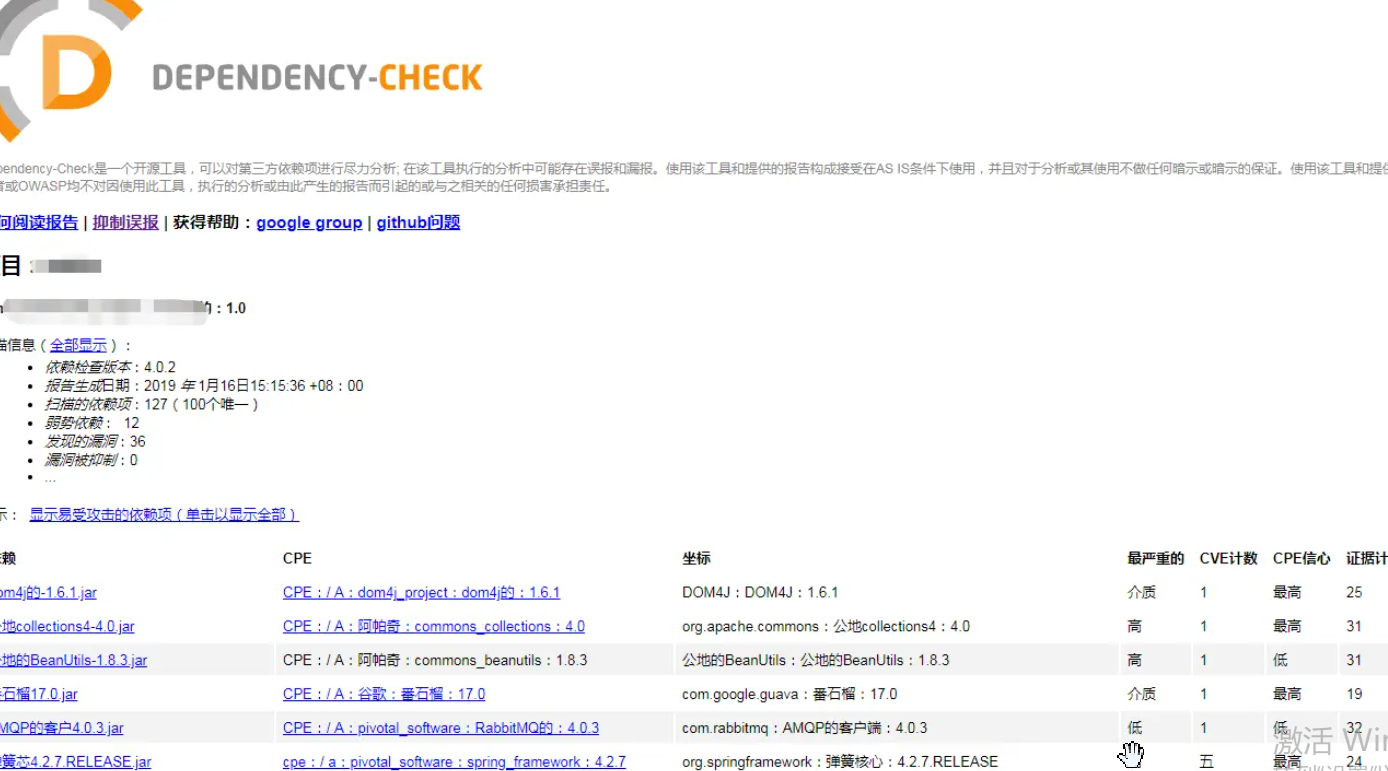
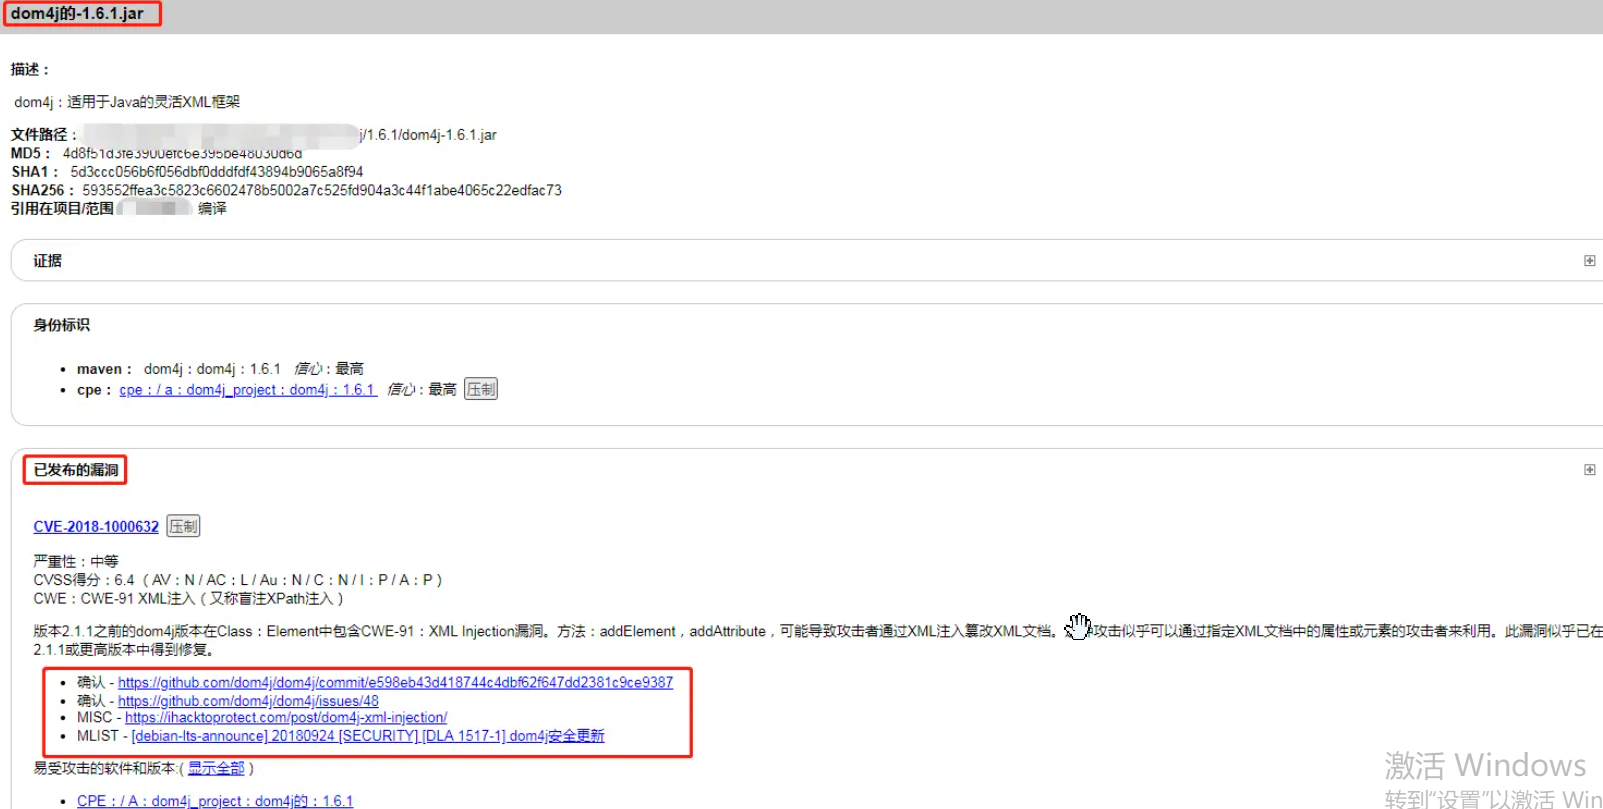
1
2
3
4
5
6
7
8
9
10
11
12
13
14
15
16
17
18
19
20
21
22
23
24
25
26
27
28
29
30
31
32
33
34
35
36
37
38
39
40
41
42
43
44
45
46
47
48
49
50
51
52
53
54
55
56
57
58
59
60
61
62
63
64
65
66
67
68
69
70
71
72
73
74
75
76
77
78
79
80
81
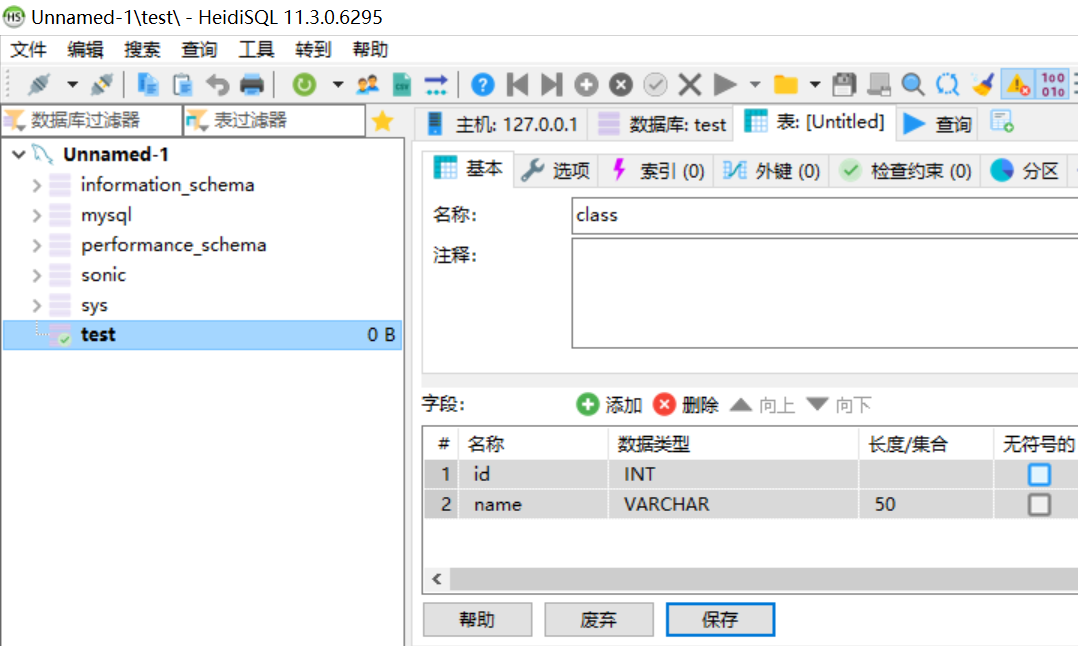
| import time
import sqlite3
#打开数据库
def open_db():
#创建SQLite数据库
con=sqlite3.connect(r"D:\project\pythonSql\sample.db")
#创建表book:包含3列,id(主键,学号),name,tel
# con.execute("create table if not exists book(id primary key,name,tel)")
con.execute("create table if not exists book(id INTEGER PRIMARY KEY, name TEXT, tel TEXT, timer TEXT);")
#创建游标对象
cur=con.cursor()
# 涉及到修改,删除等入库的操作必须用con.commit()提交事务最终完成
# cur 主要是进行查询
return con,cur
#查询全部信息
def show_all_db():
print("******通讯录现有数据******")
cur_1=open_db()[1]
cur_1.execute("select id,name,tel from book")
for row in cur_1:
print(row)
print(row[0])
#向数据库中添加内容
def add_db(name,tel):
print("******数据添加功能******")
cur_1=open_db()
# cur_1[1].execute("insert into book(id,name,tel) values(?,?,?)",(id,name,tel))
cur_1[1].execute("insert into book(name,tel) values(?,?)",(name,tel))
cur_1[0].commit()
print("******数据添加成功******")
#删除数据库中的内容
def delete_db(del_id):
print("******数据删除功能******")
cur_1=open_db()
cur_1[1].execute("delete from book where id="+del_id)
cur_1[0].commit()
print("******数据删除成功******")
show_all_db()
#关闭游标对象
cur_1[1].close()
#修改数据库中的内容
def alter_db(id,name,tel):
print("******数据修改功能******")
cur_1=open_db()
#更新数据使用 SQL 语句中的 update
cur_1[1].execute("update book set name = ? ,tel = ? where id ="+id,(name,tel))
#游标事务提交
cur_1[0].commit()
show_all_db()
cur_1[1].close()
#查询数据
def query_data(id):
print("******数据查询功能******")
cur_1=open_db()
cur_1[1].execute("select id,name,tel from book where id ="+id)
print("******查询结果如下******")
for row in cur_1[1]:
print(row)
cur_1[1].close()
if __name__=="__main__":
# add_db("你好", "185111")
# show_all_db()
# query_data("1")
# alter_db("1", "我好", "hehe")
# query_data("1")
# delete_db("1")
show_all_db()
|