0%

说明

本次主要按照这个博主的go-zero微服务实战进行学习

安装依赖

  • 安装依赖go-zero: go get -u github.com/zeromicro/go-zero@latest
  • 安装依赖goctl,用命令进行安装:go install github.com/zeromicro/go-zero/tools/goctl@latest
  • 安装成功后,输入go env 找到GOPATH
1
2
3
4
5
E:\proj\gowork\studyGoZero>go env
set GO111MODULE=on
set GOPATH=C:\Users\Administrator\go
set GOROOT=E:\app\Go
....
  • C:\Users\Administrator\go\bin\goctl.exe 拷贝到GOROOT\bin目录下
  • 查看版本成功
1
2
PS E:\proj\gowork\studyGoZero\apps\order> goctl --version
goctl version 1.5.4 windows/amd64
  • 安装protoc ,查看他的作用
1
goctl env check --install --verbose --force
  • 安装protoc 成功后,把C:\Users\Administrator\go\bin\ 的相关文件拷贝到GOROOT\bin

服务划分

image-20230721102332169

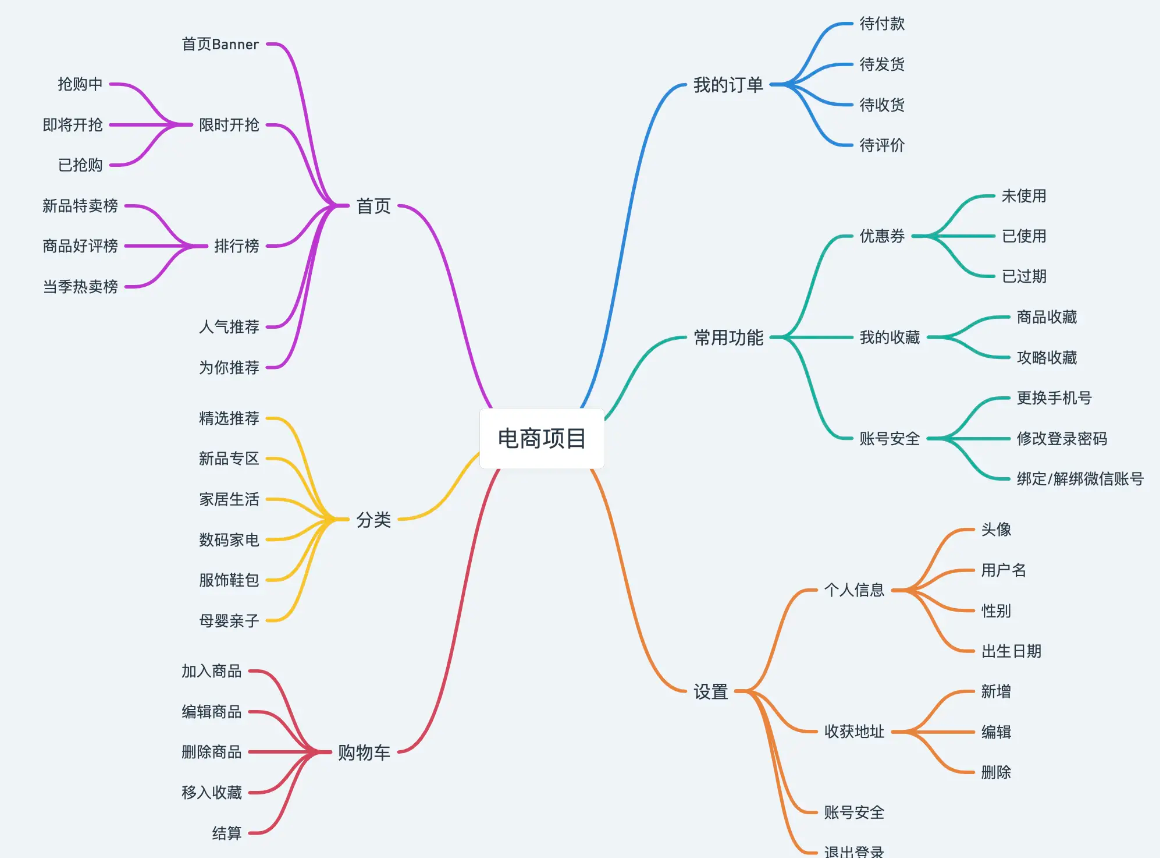
从以上思维导图可以看出整个电商系统功能还是比较多的,我们根据业务职能做如下微服务的划分:

  • 商品服务(product) - 商品的添加、信息查询、库存管理等功能
  • 购物车服务(cart) - 购物车的增删改查
  • 订单服务(order) - 生成订单,订单管理
  • 支付服务(pay) - 通过调用第三方支付实现支付功能
  • 账号服务(user) - 用户信息、等级、封禁、地址管理
  • 推荐服务(recommend) - 首页商品推荐
  • 评论服务(reply) - 商品的评论功能、评论的回复功能

BFF层

  • 但对于一个复杂的高并发的系统来说,我们需要处理各种异常的场景,比如某个页面需要依赖多个微服务提供的数据,为了避免串行请求导致的耗时过长,我们一般会并行的请求多个微服务,这个时候其中的某个服务请求异常的话我们可能需要做一些特殊的处理,比如提供一些降级的数据等。我们的解决方案就是加一层,即BFF层,通过BFF对外提供HTTP接口,客户端只与BFF进行交互,我们的这个项目为了简化只会采用一个BFF服务

image-20230721102651764

  • 我们可以提供多个BFF吗?答案是当然可以。BFF的目的是为客户端提供一个集中的接口,例如移动端页面和浏览器页面的数据协议不同,这种情况下为了更好的表示数据,可以使用两个BFF,同时只供一个BFF如果该BFF异常就会导致所有的业务受影响,提供多个BFF也可以提高服务的可用性,降低业务异常的影响面。多个BFF架构图如下:

image-20230721102751280

项目结构

  • 初始化项目
1
2
3
4
cd E:\proj\gowork
mkdir studyGoZero
cd studyGoZero
go mod init example.com/studyGoZero
  • 目录结构如下
1
2
3
4
5
6
7
8
9
10
11
12
13
14
15
16
17
18
19
20
21
22
23
24
25
26
27
28
29
30
31
32
─apps
│ ├─app
│ │ └─api
│ ├─cart
│ │ ├─admin
│ │ ├─rmq
│ │ └─rpc
│ ├─order
│ │ ├─admin
│ │ ├─rmq
│ │ └─rpc
│ ├─paly
│ │ ├─admin
│ │ ├─rmq
│ │ └─rpc
│ ├─product
│ │ ├─admin
│ │ ├─rmq
│ │ └─rpc
│ ├─recommend
│ │ ├─admin
│ │ ├─rmq
│ │ └─rpc
│ ├─reply
│ │ ├─admin
│ │ ├─rmq
│ │ └─rpc
│ └─user
│ ├─admin
│ ├─rmq
│ └─rpc
└─pkg
  • 其中apps存放的是我们所有的微服务,比如order为订单相关的微服务,pkg目录为所有服务共同依赖的包的存放路径,比如所有的服务都需要依赖鉴权就可以放到pkg目录下
  • app - BFF服务
  • cart - 购物车服务
  • order - 订单服务
  • pay - 支付服务
  • product - 商品服务
  • recommend - 推荐服务
  • reply - 评论服务
  • user - 账号服务

在每个服务目录下我们又会分为多个服务,主要会有如下几类服务:

  • api - 对外的BFF服务,接受来自客户端的请求,暴露HTTP接口
  • rpc - 对内的微服务,仅接受来自内部其他微服务或者BFF的请求,暴露gRPC接口
  • rmq - 负责进行流式任务处理,上游一般依赖消息队列,比如kafka等
  • admin - 也是对内的服务,区别于rpc,更多的是面向运营侧的且数据权限较高,通过隔离可带来更好的代码级别的安全,直接提供HTTP接口

API 定义

首页API

首页功能主要分为四个部分,搜索、Banner图、限时抢购和推荐商品列表,点击搜索框会跳转到搜索页,推荐部分是分页展示的,用户通过不断地往上滑动可以加载下一页。通过分析首页我们大致需要提供三个接口,分别是Banner接口,限时抢购接口和推荐接口。

image-20230720110620328

  • 打开apps\app\api\api.api文件,写入对外api的代码定义
1
2
3
4
5
6
7
8
9
10
11
12
13
14
15
16
17
18
19
20
21
22
23
24
25
26
27
28
29
30
31
32
33
34
35
36
37
38
39
40
41
42
43
syntax = "v1"
type (
// 首页的banner响应请求
HomeBannerResponse {
Banners []*Banner `json:"banners"`
}
.....

)

service api-api {

@doc "首页Banner"
@handler HomeBannerHandler
get /v1/home/banner returns (HomeBannerResponse)

@doc "限时抢购"
@handler FlashSaleHandler
get /v1/flashsale returns (FlashSaleResponse)

@doc "推荐商品列表"
@handler RecommendHandler
get /v1/recommend (RecommendRequest) returns (RecommendResponse)

@doc "分类商品列表"
@handler CategoryListHandler
get /v1/category/list (CategoryListRequest) returns (CategoryListResponse)
@doc "购物车列表"
@handler CartListHandler
get /v1/cart/list (CartListRequest) returns (CartListResponse)

@doc "商品评论列表"
@handler ProductCommentHandler
get /v1/product/comment (ProductCommentRequest) returns (ProductCommentResponse)

@doc "订单列表"
@handler OrderListHandler
get /v1/order/list (OrderListRequest) returns (OrderListResponse)

@doc "商品详情"
@handler ProductDetailHandler
get /v1/product/detail (ProductDetailRequest) returns (ProductDetailResponse)
}
  • 定义好api后,我们使用如下命令重新生成项目代码,输出如下信息表明生成成功
1
2
3
4
5
6
7
8
9
10
11
12
13
14
15
16
17
18
19
20
21
22
23
24
25
26
27
28
29
30
31
32
33
34
35
36
37
38
39
40
41
42
PS E:\proj\gowork\studyGoZero\apps\app\api> goctl api go -api api.api -dir .
Done.

// 查看目录
PS E:\proj\gowork\studyGoZero\apps\app\api> tree /f
E:.
│ api.api
│ api.go

├─etc
│ api-api.yaml

└─internal
├─config
│ config.go

├─handler
│ cartlisthandler.go
│ categorylisthandler.go
│ flashsalehandler.go
│ homebannerhandler.go
│ orderlisthandler.go
│ productcommenthandler.go
│ productdetailhandler.go
│ recommendhandler.go
│ routes.go

├─logic
│ cartlistlogic.go
│ categorylistlogic.go
│ flashsalelogic.go
│ homebannerlogic.go
│ orderlistlogic.go
│ productcommentlogic.go
│ productdetaillogic.go
│ recommendlogic.go

├─svc
│ servicecontext.go

└─types
types.go

admin 层代码

order目录

  • 目录为: E:\proj\gowork\studyGoZero\apps\order

  • 执行如下命令即可初始化order admin代码,注意order adminapi服务,直接对前端提供HTTP接口

    1
    E:\proj\gowork\studyGoZero\apps\order> goctl api new admin
  • 代码结构如下

1
2
3
4
5
6
7
─admin
│ │ admin.api
│ │ admin.go
│ │
│ ├─etc
│ │ admin-api.yaml
│ │
  • 生成的服务代码我们可以直接运行go run admin.go,默认侦听在8888端口

    1
    2
    PS E:\proj\gowork\studyGoZero\apps\order\admin> go run .\admin.go 
    Starting server at 0.0.0.0:8888...
  • 对于rmq服务我们会使用go-zero提供的 kq 功能,这里先初始化main.go

其他层

  • pay、pruduct、recommend、reply、user 等按照同样的方式进行初始化

rpc服务层

  • Goctl Rpc是goctl脚手架下的一个rpc服务代码生成模块,支持proto模板生成和rpc服务代码生成,通过此工具生成代码你只需要关注业务逻辑编写而不用去编写一些重复性的代码

  • 作者博客中初始化rpc使用的这种 goctl rpc new rpc ,并不推荐,研究代码后发现和作者提供的仓库代码不一致,使用的第二种方式生成的rpc服务层的代码和目录:通过指定proto生成rpc服务

  • 因为BFF只负责数据的组装工作,数据真正的来源是各个微服务通过RPC接口提供,接下来我们来定义各个微服务的proto。如下展示的订单列表页面由两部分数据组成,分别是订单数据和商品数据,也就是我们的BFF需要依赖order-rpc和product-rpc来完成该页面数据的组装,下面我们分别来定义order-rpc和product-rpc

image-20230725100643383

order层

  • E:\proj\gowork\studyGoZero\apps\order\rpc\order.proto,定义如下,service名字为Order,添加了Orders获取订单列表rpc接口。
1
2
3
4
5
6
7
8
9
10
11
12
13
14
15
16
17
syntax = "proto3";

package order;
option go_package = "./order";


service Order {
rpc Orders(OrdersRequest) returns(OrdersResponse);
rpc CreateOrder(CreateOrderRequest) returns (CreateOrderResponse);
rpc CreateOrderCheck(CreateOrderRequest) returns (CreateOrderResponse);
rpc RollbackOrder (CreateOrderRequest) returns (CreateOrderResponse);
rpc CreateOrderDTM(AddOrderReq) returns (AddOrderResp);
rpc CreateOrderDTMRevert(AddOrderReq) returns(AddOrderResp);
rpc GetOrderById(GetOrderByIdReq) returns (GetOrderByIdResp);
}

....

使用如下命令重新生成代码,注意这里需要依赖protoc-gen-goprotoc-gen-go-grpc两个插件,木有安装的话执行下面命令会报错:

1
2
PS E:\proj\gowork\studyGoZero\apps\order\rpc>  goctl rpc protoc order.proto --go_out=. --go-grpc_out=. --zrpc_out=.
Done.

注意最终生成的服务端的代码目录为:E:\proj\gowork\studyGoZero\apps\order\rpc\orderclient\order.go

目录结构如下:

1
2
3
4
5
6
7
8
9
10
11
12
13
14
15
16
17
18
19
20
21
22
23
24
25
26
27
28
29
30
31
32
33
34
35
PS E:\proj\gowork\studyGoZero\apps\order\rpc> tree /f
卷 软件盘 的文件夹 PATH 列表
卷序列号为 240F-1787
E:.
│ order.go
│ order.proto

├─etc
│ order.yaml

├─internal
│ ├─config
│ │ config.go
│ │
│ ├─logic
│ │ createorderchecklogic.go
│ │ createorderdtmlogic.go
│ │ createorderdtmrevertlogic.go
│ │ createorderlogic.go
│ │ getorderbyidlogic.go
│ │ orderslogic.go
│ │ rollbackorderlogic.go
│ │
│ ├─server
│ │ orderserver.go
│ │
│ └─svc
│ servicecontext.go

├─order
│ order.pb.go
│ order_grpc.pb.go

└─orderclient
order.go
  • 本地安装etcd,打开E:\app\etcd-v3.4.27-windows-amd64\etcd.exe启动服务

etcd是一个分布式一致性键值存储,其主要用于分布式系统的共享配置和服务发现。

etcd由Go语言编写

  • 生成好后然后启动order-rpc服务,需要连接etcd服务
1
2
3
4
5
PS E:\proj\gowork\studyGoZero\apps\order\rpc> go run .\order.go
Starting rpc server at 0.0.0.0:8080...
{"@timestamp":"2023-07-24T17:03:51.723+08:00","caller":"stat/usage.go:61","content":"CPU: 0m, MEMORY: Alloc=3.2Mi, TotalAlloc=6.1Mi, Sys=17.9Mi, NumGC=3","level":"stat"}
{"@timestamp":"2023-07-24T17:03:51.737+08:00","caller":"load/sheddingstat.go:61","content":"(rpc) shedding_stat [1m], cpu: 0, total: 0, pass: 0, drop: 0","level":"stat"}
{"@timestamp":"2023-07-24T17:04:51.711+08:00","caller":"stat/usage.go:61","content":

在E:\proj\gowork\studyGoZero\apps\order\rpc\etc\order.yaml中,可以看到etcd的连接服务器地址,和order-rpc启动的地址信息:

1
2
3
4
5
6
Name: order.rpc
ListenOn: 0.0.0.0:8080
Etcd:
Hosts:
127.0.0.1:2379
Key: order.rpc

product

E:\proj\gowork\studyGoZero\apps\product\rpc\product.proto,定义如下,service名字为Order,添加了product产品的rpc接口。

1
2
3
4
5
6
7
8
9
10
11
12
13
14
15
16
17
18
19
syntax = "proto3";

package product;
option go_package = "./product";

service Product {
rpc Product(ProductItemRequest) returns (ProductItem) ;
rpc Products(ProductRequest) returns(ProductResponse);
rpc ProductList(ProductListRequest) returns(ProductListResponse);
rpc OperationProducts(OperationProductsRequest) returns (OperationProductsResponse);
rpc UpdateProductStock(UpdateProductStockRequest) returns (UpdateProductStockResponse);
rpc CheckAndUpdateStock(CheckAndUpdateStockRequest) returns (CheckAndUpdateStockResponse);
rpc CheckProductStock(UpdateProductStockRequest) returns (UpdateProductStockResponse);
rpc RollbackProductStock(UpdateProductStockRequest) returns (UpdateProductStockResponse);
rpc DecrStock(DecrStockRequest) returns(DecrStockResponse);
rpc DecrStockRevert(DecrStockRequest) returns(DecrStockResponse);
}
...

  • E:\proj\gowork\studyGoZero\apps\product\rpc\etc\product.yaml配置启动服务地址端口为8081
1
2
3
4
5
6
Name: product.rpc
ListenOn: 0.0.0.0:8081
Etcd:
Hosts:
- 127.0.0.1:2379
Key: product.rpc
  • 启动product-rpc服务,需要连接etcd服务
1
2
PS E:\proj\gowork\studyGoZero\apps\product\rpc> go run .\product.go
Starting rpc server at 0.0.0.0:8081...

BUFF 层配置

  • 因为我们的BFF需要依赖order.rpc和product.rpc,我们需要先添加配置文件(E:\proj\gowork\studyGoZero\apps\app\api\etc\api-api.yaml),如下:

    1
    2
    3
    4
    5
    6
    7
    8
    9
    10
    11
    12
    13
    Name: api-api
    Host: 0.0.0.0
    Port: 8888
    OrderRPC:
    Etcd:
    Hosts:
    - 127.0.0.1:2379
    Key: order.rpc
    ProductRPC:
    Etcd:
    Hosts:
    - 127.0.0.1:2379
    Key: product.rpc
  • 然后在E:\proj\gowork\studyGoZero\apps\app\api\internal\svc\servicecontext.go中添加RPC的客户端,如下:

    1
    2
    3
    4
    5
    6
    7
    8
    9
    10
    11
    12
    13
    14
    15
    16
    17
    18
    19
    20
    package svc

    import (
    "example.com/studyGoZero/apps/app/api/internal/config"
    "example.com/studyGoZero/apps/order/rpc/orderclient"
    "example.com/studyGoZero/apps/product/rpc/productclient"
    )

    type ServiceContext struct {
    Config config.Config
    OrderRPC orderclient.Order
    ProductRPC productclient.Product
    }

    func NewServiceContext(c config.Config) *ServiceContext {
    return &ServiceContext{
    Config: c,
    }
    }

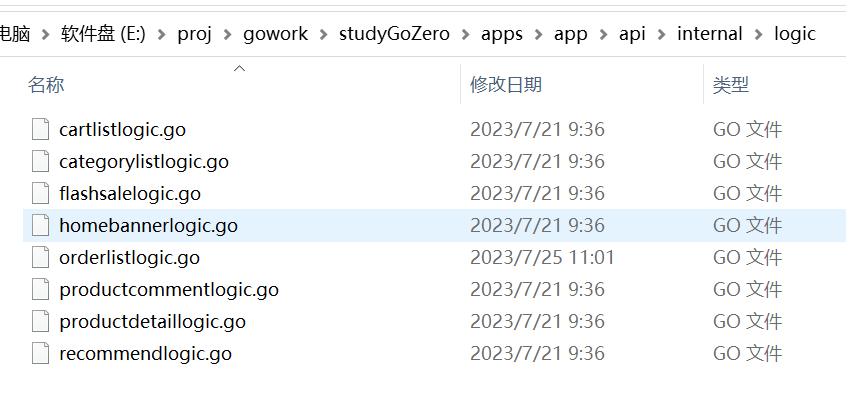
最后只要在订单接口的E:\proj\gowork\studyGoZero\apps\app\api\internal\logic\orderlistlogic.go方法中添加逻辑就可以啦,这里只是演示,所以会比较简单:

1
2
3
4
5
6
7
8
9
10
11
12
13
14
15
16
17
18
19
20
21
22
23
24
25
func (l *OrderListLogic) OrderList(req *types.OrderListRequest) (resp *types.OrderListResponse, err error) {
orderRet, err := l.svcCtx.OrderRPC.Orders(l.ctx, &order.OrdersRequest{UserId: req.UID})
if err != nil {
return nil, err
}
var pids []string
for _, o := range orderRet.Orders {
pids = append(pids, strconv.Itoa(int(o.Id)))
}
productRet, err := l.svcCtx.ProductRPC.Products(l.ctx, &product.ProductRequest{ProductIds: strings.Join(pids, ",")})
if err != nil {
return nil, err
}
var orders []*types.Order
for _, o := range orderRet.Orders {
if p, ok := productRet.Products[o.Id]; ok {
orders = append(orders, &types.Order{
OrderID: o.Orderid,
ProductName: p.Name,
})
}
}
return &types.OrderListResponse{Orders: orders}, nil
}

测试

  • 请确保order、product 的rpc服务器已经启动
1
2
3
4
5
PS E:\proj\gowork\studyGoZero\apps\product\rpc> go run .\product.go
Starting rpc server at 0.0.0.0:8081...

PS E:\proj\gowork\studyGoZero\apps\order\rpc> go run .\order.go
Starting rpc server at 0.0.0.0:8080...
  • 启动api层服务
1
2
E:\proj\gowork\studyGoZero\apps\app\api>go run .\api.go
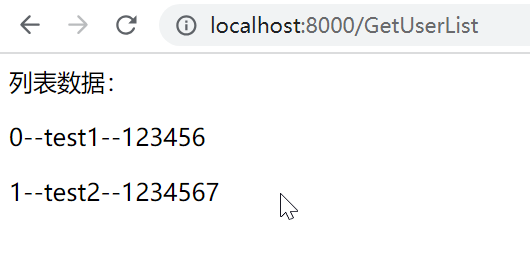
Starting rpc server at 0.0.0.0:8888...
  • 浏览器打开http://127.0.0.1:8888/v1/order/list?uid=123 发现报错空指针
1
"content":"(/v1/order/list?uid=123 - 127.0.0.1:57933) runtime error: invalid memory address or nil pointer dereference\ngoroutine 57 [running]:\nruntime/debug.Stack()\n\tE:/app/Go/src/runtime/debug/stack.go:24 +0x65\ngithub.com/zeromicro/go-zero/rest/handler.RecoverHandler.func1.1()\n\tC:/Users/Administrator/go/pkg/mod/github.com/zeromicro/go-zero@v1.5.4/rest/handler/recoverhandler.go:16 +0x66\npanic({0x1f56680, 0x331f9d0})\n\tE:/app/Go/src/runtime/panic.go:884 +0x213\nexample.com/studyGoZero/apps/app/api/internal/logic.(*OrderListLogic).OrderList(0xc0002cfcf8, 0xc00011e380)\n\tE:/proj/gowork/studyGoZero/apps/app/api/internal/logic/orderlistlogic.go:31
  • 虽然报错 了,但是可以知道整个服务已经是通的,因为现在并没有订单的任何数据

总结

  • api层- 对外的BFF服务。接受来自客户端的请求,暴露HTTP接口。本次实例启动了api.go,并且连接了order和product的rpc
  • api/api.api 为具体的对我暴露的请求
  • app\api\internal\logic 对应api/api.api为对外暴露请求的具体逻辑,具体代码又调用了order和product的rpc的逻辑

image-20230725145056412

说明

  • 本次主要在win10, go 1.20.4下,利用go 操作mongodb

安装启动

  • 打开地址下载安装包
  • 解压后目录如下,添加两个文件夹data和logs文件夹,用来存储mongodb的数据和日志文件
1
2
3
4
5
6
7
8
9
D:\app\mongodb-win32-x86_64-windows-6.0.6>tree
卷 项目盘 的文件夹 PATH 列表
卷序列号为 8C07-3198
D:.
├─bin
├─data
│ ├─diagnostic.data
│ └─journal
└─logs
  • 启动服务
1
D:\app\mongodb-win32-x86_64-windows-6.0.6\bin>mongod.exe --dbpath D:\app\mongodb-win32-x86_64-windows-6.0.6\data --logpath D:\app\mongodb-win32-x86_64-windows-6.0.6\logs\mongodb.log
  • 启动成功后data目录下会自动生成MongoDB数据库的一些信息,logs目录下存的则是日志文件,文件内容是启动信息

  • 安装连接工具mongodb compass,连接mongodb,地址是本地127.0.0.1,默认端口是27017

image-20230712171639801

  • 默认连接没有用户名和密码,需要进行设置
  • 点击底部菜单,输入use admin

image-20230712180544757

  • 然后输入
1
2
3
4
5
6
7
8
db.createUser({
user: 'admin', // 用户名
pwd: '123456', // 密码
roles:[{
role: 'root', // 角色---超级管理员才可以使用该角色
db: 'admin' // 数据库
}]
})

image-20230712180758846

  • 其他常用语句
1
2
3
4
5
6
7
8
9

> show dbs
admin 132.00 KiB
config 108.00 KiB
local 72.00 KiB
user 40.00 KiB
>db.auth("admin","123456") -- 授权
{ ok: 1 }

  • mongodb compass 中为admin数据库中加入users的collection

image-20230712194613916

代码编写

服务端代码

  • 初始化项目
1
2
3
4
cd E:\proj\gowork
mkdir studyMongoDB
cd studyMongoDB
go mod init example.com/studyMongoDB
  • 用vscode 打开文件夹,安装依赖
1
2
3
go get -u github.com/gin-gonic/gin
go get go.mongodb.org/mongo-driver/mongo

  • 编写测试代码
1
2
3
4
5
6
7
8
9
10
11
12
13
14
15
16
17
18
19
20
21
22
23
24
25
26
27
28
29
30
31
32
33
34
35
36
37
38
39
40
41
42
43
44
45
46
47
48
49
50
51
52
53
54
55
56
57
58
59
60
61
62
63
64
65
66
67
68
69
70
71
72
73
74
75
76
77
78
79
80
81
82
//main.go

package main

import (
"context"
"fmt"
"log"
"time"

"go.mongodb.org/mongo-driver/bson"
"go.mongodb.org/mongo-driver/mongo"
"go.mongodb.org/mongo-driver/mongo/options"
"go.mongodb.org/mongo-driver/mongo/readpref"
)

type Student struct {
Id int32
Name string
Age int
}

// pool 连接池模式
func ConnectToDB(uri, name string, timeout time.Duration, num uint64) (*mongo.Database, error) {
// 设置连接超时时间
ctx, cancel := context.WithTimeout(context.Background(), timeout)
defer cancel()
// 通过传进来的uri连接相关的配置
o := options.Client().ApplyURI(uri)
// 设置最大连接数 - 默认是100 ,不设置就是最大 max 64
o.SetMaxPoolSize(num)
// 发起链接
client, err := mongo.Connect(ctx, o)
if err != nil {
fmt.Println(err)
return nil, err
}
// 判断服务是不是可用
if err = client.Ping(context.Background(), readpref.Primary()); err != nil {
log.Fatal(err)
return nil, err
}
// 返回 client
return client.Database(name), nil
}

func main() {

toDB, err := ConnectToDB("mongodb://admin:123456@localhost:27017", "admin", time.Duration(2), 50)
fmt.Println(err)
if err != nil {
fmt.Println(err)
fmt.Println(toDB)
return
}
fmt.Println("sussces")
doc := Student{Name: "刘刘", Age: 18, Id: 1}

coll := toDB.Collection("users")
objId, err := coll.InsertOne(context.TODO(), doc)
fmt.Println(objId)
if err != nil {
return
}
fmt.Println("新增成功")
var one Student
filter := bson.D{{"id", 1}}
var ctx context.Context
var cancel func()
ctx, cancel = context.WithTimeout(context.Background(), 5*time.Second)
defer cancel()
err = coll.FindOne(ctx, filter).Decode(&one)
if err == mongo.ErrNoDocuments {
// Do something when no record was found
fmt.Println("record does not exist")
} else if err != nil {
log.Fatal(err)
}
fmt.Println(one)

}

  • 运行结果
1
2
3
4
5
6
7
PS E:\proj\gowork\studyMongoDb> go run .\main.go
<nil>
sussces
&{ObjectID("64ae992a5063fc95642035ed")}
新增成功
{1 刘刘 18}
PS E:\proj\gowork\studyMongoDb>

gin和mongodb

  • dbs\db.go为连接数据库代码
1
2
3
4
5
6
7
8
9
10
11
12
13
14
15
16
17
18
19
20
21
22
23
24
25
26
27
28
29
30
31
32
33
34
35
36
37
38
39
40
41
42
43
44
45
46
47
package dbs

import (
"context"
"fmt"
"log"
"time"

"go.mongodb.org/mongo-driver/mongo"
"go.mongodb.org/mongo-driver/mongo/options"
"go.mongodb.org/mongo-driver/mongo/readpref"
)

var (
Client *mongo.Client // database 话柄
Collection *mongo.Collection // collection 话柄
)

// pool 连接池模式
func ConnectToDB(uri, name string) {

cb := context.Background()
// 设置连接超时时间
ctx1, cancel := context.WithTimeout(cb, time.Duration(2))
defer cancel()
// 通过传进来的uri连接相关的配置
o := options.Client().ApplyURI(uri)
// 设置最大连接数 - 默认是100 ,不设置就是最大 max 64
o.SetMaxPoolSize(50)
// 发起链接
client, err := mongo.Connect(ctx1, o)
if err != nil {
fmt.Println(err)
return
}
// 判断服务是不是可用
if err = client.Ping(cb, readpref.Primary()); err != nil {
log.Fatal(err)
return
}
// 默认连接的数据库
_db := client.Database(name)

Client = client
// 默认连接集合为users
Collection = _db.Collection("users")
}
  • models/user.go 操作实体类
1
2
3
4
5
6
7
8
9
10
11
12
13
14
15
16
17
18
19
20
21
22
23
24
25
26
27
28
29
30
31
32
33
34
35
36
37
38
39
40
41
42
43
44
45
46
47
48
49
50
51
52
53
54
55
56
57
58
59
60
61
62
63
64
65
66
67
68
69
70
71
72
73
74
75
76
77
78
79
80
81
82
83
84
85
86
87
88
89
90
91
92
93
94
95
package models

import (
"context"
"fmt"
"log"

"example.com/studyMongoDb/dbs"
"go.mongodb.org/mongo-driver/bson"
)

type User struct {
Key string `json:"key"`
Name string `json:"name"`
Password string `json:"password"`
Id int `json:"id"`
}


func (u *User) GetList(ctx context.Context) (users []User, err1 error) {
cur, err := dbs.Collection.Find(ctx, bson.D{})
if err != nil {
log.Fatal(err)
return
}
if err := cur.Err(); err != nil {
log.Fatal(err)
return
}
err = cur.All(ctx, &users)
if err != nil {
log.Fatal(err)
return
}
cur.Close(ctx)
return

}

func (u *User) Query() (user []User, err1 error) {
cb := context.Background()
fil := bson.M{"key": u.Key}
// 模糊查询
// bson.M{"Name": primitive.Regex{Pattern: u.name}}
cur, err := dbs.Collection.Find(cb, fil)
// dbs.Collection.FindOne(cb, fil).Decode(&user)
if err != nil {
log.Fatal(err)
return
}
if err := cur.Err(); err != nil {
log.Fatal(err)
return
}
err = cur.All(cb, &user)
if err != nil {
log.Fatal(err)
return
}
cur.Close(cb)
return

}

func (u *User) Add() (err error) {
objId, err1 := dbs.Collection.InsertOne(context.TODO(), &u)
if err1 != nil {
fmt.Println("insert into error:", err)

}
fmt.Println("录入数据成功,", objId)
return
}
func (u *User) EditOne() (err1 error) {
fil := bson.M{"key": u.Key}
update := bson.M{"$set": u}
// .update({条件},{修改后的数据})
updateResult, err := dbs.Collection.UpdateOne(context.Background(), fil, update)
if err != nil {
log.Fatal(err)
}
log.Println("collection.UpdateOne:", updateResult)
return
}

func (u *User) Delete() (err1 error) {
fil := bson.M{"key": u.Key}
deleteResult, err := dbs.Collection.DeleteOne(context.Background(), fil)
if err != nil {
log.Fatal(err)
}
log.Println("collection.DeleteOne:", deleteResult)
return
}

  • api\users.go 调用model层代码
1
2
3
4
5
6
7
8
9
10
11
12
13
14
15
16
17
18
19
20
21
22
23
24
25
26
27
28
29
30
31
32
33
34
35
36
37
38
39
40
41
42
43
44
45
46
47
48
49
50
51
52
53
54
55
56
57
58
59
60
61
62
63
64
65
66
67
68
69
70
71
72
73
74
75
76
77
78
79
80
81
82
83
84
85
86
87
88
89
90
91
92
93
94
95
96
97
98
99
100
101
102
103
104
105
106
107
108
109
110
111
112
113
114
115
116
117
118
119
120
121
122
123
124
125
package api

import (
"context"
"fmt"
"net/http"

"example.com/studyMongoDb/models"
"github.com/gin-gonic/gin"
)

func UserAdd(c *gin.Context) {
var user models.User
if c.Bind(&user) == nil { //把客户端格式传过来的数据绑定到结构体user中去
fmt.Println("data=", user)
err := user.Add() // 调用model层的对应方法
if err != nil {

c.JSON(http.StatusOK, gin.H{
"msg": "新增失败",
"code": -1,
})

} else {
c.JSON(http.StatusOK, gin.H{
"msg": "新增成功",
"code": 1,
})
}
} else {
c.JSON(400, gin.H{"JSON=== status": "binding JSON error!"})
}
}

func UserList(c *gin.Context) {
var user models.User
if c.Bind(&user) == nil { //把客户端格式传过来的数据绑定到结构体user中去
users, err := user.GetList(context.Background()) // 调用model层的对应方法
if err != nil {

c.JSON(http.StatusOK, gin.H{
"msg": "获取列表失败",
"code": -1,
})

} else {
c.JSON(http.StatusOK, gin.H{
"msg": "获取列表成功",
"code": 1,
"users": users,
})
}
} else {
c.JSON(400, gin.H{"JSON=== status": "binding JSON error!"})
}
}

func UserEditOne(c *gin.Context) {
var user models.User
if c.Bind(&user) == nil {
err := user.EditOne()
if err != nil {

c.JSON(http.StatusOK, gin.H{
"msg": "编辑失败",
"code": -1,
})

} else {
c.JSON(http.StatusOK, gin.H{
"msg": "编辑成功",
"code": 1,
})
}
} else {
c.JSON(400, gin.H{"JSON=== status": "binding JSON error!"})
}
}

func UserDelete(c *gin.Context) {
var user models.User
if c.Bind(&user) == nil {
err := user.Delete()
if err != nil {

c.JSON(http.StatusOK, gin.H{
"msg": "删除失败",
"code": -1,
})

} else {
c.JSON(http.StatusOK, gin.H{
"msg": "删除成功",
"code": 1,
})
}
} else {
c.JSON(400, gin.H{"JSON=== status": "binding JSON error!"})
}
}
func UserQuery(c *gin.Context, key string) {
user := models.User{
Key: key,
}
if c.Bind(&user) == nil {
user, err := user.Query()
if err != nil {

c.JSON(http.StatusOK, gin.H{
"msg": "查询失败",
"code": -1,
})

} else {
c.JSON(http.StatusOK, gin.H{
"msg": "查询成功",
"code": 1,
"user": user,
})
}
} else {
c.JSON(400, gin.H{"JSON=== status": "binding JSON error!"})
}
}

  • routers/router.go 路由层,调用api层的代码
1
2
3
4
5
6
7
8
9
10
11
12
13
14
15
16
17
18
19
20
21
22
package routers

import (
"example.com/studyMongoDb/api"
"github.com/gin-gonic/gin"
)

func InitRouter() *gin.Engine {

router := gin.Default()
router.POST("/UserAdd", api.UserAdd)
router.GET("/UserList", api.UserList)
router.POST("/UserEditOne", api.UserEditOne)
router.POST("/UserDelete", api.UserDelete)
router.GET("/UserQuery/:key", func(c *gin.Context) {
key := c.Param("key")
api.UserQuery(c, key)
})

return router
}

  • main.go 代码入口
1
2
3
4
5
6
7
8
9
10
11
12
13
14
15
16
17
18
19
package main

import (
"context"

"example.com/studyMongoDb/dbs"
"example.com/studyMongoDb/routers"
)

func main() {

dbs.ConnectToDB("mongodb://admin:123456@localhost:27017", "admin")
router := routers.InitRouter()
router.Run(":8000")
// 优雅关闭连接
defer dbs.Client.Disconnect(context.TODO())

}

  • 运行main.go
1
2
3
4
5
6
7
8
9
10
11
12
13
14
15
PS E:\proj\gowork\studyMongoDb> go run .\main.go
[GIN-debug] [WARNING] Creating an Engine instance with the Logger and Recovery middleware already attached.

[GIN-debug] [WARNING] Running in "debug" mode. Switch to "release" mode in production.
- using env: export GIN_MODE=release
- using code: gin.SetMode(gin.ReleaseMode)

[GIN-debug] POST /UserAdd --> example.com/studyMongoDb/api.UserAdd (3 handlers)
[GIN-debug] GET /UserList --> example.com/studyMongoDb/api.UserList (3 handlers)
[GIN-debug] POST /UserEditOne --> example.com/studyMongoDb/api.UserEditOne (3 handlers)
[GIN-debug] POST /UserDelete --> example.com/studyMongoDb/api.UserDelete (3 handlers)
[GIN-debug] GET /UserQuery/:key --> example.com/studyMongoDb/routers.InitRouter.func1 (3 handlers)
[GIN-debug] [WARNING] You trusted all proxies, this is NOT safe. We recommend you to set a value.
Please check https://pkg.go.dev/github.com/gin-gonic/gin#readme-don-t-trust-all-proxies for details.
[GIN-debug] Listening and serving HTTP on :8000

客户端代码

  • 测试的客户端代码,使用python
1
2
3
4
5
6
7
8
9
10
11
12
13
14
15
16
17
18
19
20
21
import requests

data ={"name": "test111", "password": "1123456", "id": 2, "key": "t_key2"}
resp = requests.post("http://127.0.0.1:8000/UserAdd", json=data)
print(resp.text)


data ={"name": "test1131", "password": "123456811", "id": 1112, "key": "t_key1"}
resp = requests.post("http://127.0.0.1:8000/UserEditOne", json=data)
print(resp.text)
#
data ={"key": "t_key1"}
resp = requests.post("http://127.0.0.1:8000/UserDelete", json=data)
print(resp.text)


resp = requests.get("http://127.0.0.1:8000/UserQuery/t_key2/")
print(resp.text)

resp = requests.get("http://127.0.0.1:8000/UserList")
print(resp.text)

说明

本次主要时在windows下,利用go 操作redis

redis

概述

  • Redis(Remote Dictionary Server ),即远程字典服务,它是一个开源的,使用ANSI C语言编写、遵守BSD协议、支持网络、可基于内存亦可持久化的日志型、Key-Value数据库,并提供多种语言的API。Redis 默认端口为 6379,是一个NoSQL数据库

安装

  • 打开地址下载安装包并安装,安装成功后在环境变量中可以看到,安装目录已经加入到了PATH中

启动服务端

  • 执行命令启动服务端
1
2
D:\app\Redis>redis-server.exe redis.windows.conf
[6436] 10 Jul 17:44:10.177 # Creating Server TCP listening socket *:6379: bind: No error
  • 查看服务端口是否正常
1
2
3
D:\app\Redis>netstat -an | findstr "6379"
TCP 0.0.0.0:6379 0.0.0.0:0 LISTENING
TCP [::]:6379 [::]:0 LISTENING

启动客户端

打开redis目录中的redis.windows.conf

  • 配置Redis的设置最大占用内存,设置maxmemory参数,maxmemory是字节字节类型,如果不设置maxmemory或者设置为0,64位系统不限制内存,32位系统最多使用3GB内存。
1
2
3
# maxmemory <bytes>
# 设置最大的内存为1G
maxmemory 1000000000
  • 执行命令
1
D:\app\Redis>redis-cli.exe -h 127.0.0.1 -p 6379
  • 进行set和get操作
1
2
3
4
5
6
7
8
9
10
11
127.0.0.1:6379> set username hello
OK
127.0.0.1:6379> get username
"hello"
127.0.0.1:6379>SCAN 0 MATCH * // 查询所有key
127.0.0.1:6379> FLUSHDB //删除所有Key
127.0.0.1:6379> keys * // 查询所有key
1) "cache:user:id:23"
127.0.0.1:6379> del "cache:user:id:admin" // 删除指定key
(integer) 1

go

实现

  • 使用gin框架

  • 自定义Person结构体

  • 实现对Person的增删改查。

  • 根据id查询或查询所有、插入、修改、删除

代码

  • 先安装依赖文件
1
2
go get -u github.com/gin-gonic/gin
go get github.com/redis/go-redis/v9
  • 新建并初始化项目
1
2
3
4
cd E:\proj\gowork
mkdir studyGin
cd studyGin
go mod init example.com/goRedis
  • 用vscode ide编写代码
  • db\dbs.go 主要存放连接redis的代码
1
2
3
4
5
6
7
8
9
10
11
12
13
14
15
16
17
18
19
20
21
22
23
24
25
26
27
28
29
30
31
32
package db

import (
"context"
"fmt"

"github.com/redis/go-redis/v9"
)

var Rdbs *redis.Client

func InitRedis(ctx context.Context) {
rd := redis.NewClient(&redis.Options{
Addr: "localhost:6379",
Password: "",
DB: 0,
})
Rdbs = rd
//清空当前数据库中的所有key,只要加了这个每次重新启动服务器,所有数据被清空
// Rdbs.FlushDB(ctx)
_, err := Rdbs.Ping(ctx).Result() // PING, <nil>
if err != nil {
fmt.Println("connect redis failed:", err)
return
}

}
func Close() {
Rdbs.Close()
}


  • model\users.go 操作user的实体类,如曾删改查
1
2
3
4
5
6
7
8
9
10
11
12
13
14
15
16
17
18
19
20
21
22
23
24
25
26
27
28
29
30
31
32
33
34
35
36
37
38
39
40
41
42
43
44
45
46
47
48
49
50
51
52
53
54
55
56
57
58
59
60
61
62
63
64
65
66
67
68
69
70
71
72
73
74
75
76
77
78
79
80
81
82
83
84
85
86
87
88
89
90
91
92
93
94
95
96
97
98
99
100
101
102
103
104
105
106
107
108
109
110
111
package models

import (
"context"
"encoding/json"
"fmt"

"example.com/goRedis/db"
)

type User struct {
Key string `json:"key"`
Name string `json:"name"`
Password string `json:"password"`
Id int `json:"id"`
}

// 存储和读取redis时,不能直接存入结构体,必须进行序列号和反序列化

// 序列化
func (u *User) MarshalBinary() (data []byte, err error) {
return json.Marshal(u)
}

// 反序列化
func (u *User) UnmarshalBinary(data []byte) (err error) {
return json.Unmarshal(data, u)
}

// 新增数据
func (u *User) Add(ctx *context.Context) (err error) {

// HMSet 批量设置 map[string]interface{}{"name": "张", "password": "11111", "id": 123}

fmt.Println("json.=", u)
// 必须转为[]byte, redis不支持直接存结构体

// 0 表示key永不过期
_, err = db.Rdbs.Set(*ctx, u.Key, u, 0).Result()
if err != nil {
fmt.Println("db.Rdbs.Set,", err)
return
}
return
}

// 根据key 获取到数据
func (u *User) GetUser(ctx *context.Context) (user1 User, err error) {

err = db.Rdbs.Get(*ctx, u.Key).Scan(u)
if err != nil {
fmt.Println("GetUser error", err)
return
}
user1 = *u
return
}

// 查询所有
func (u *User) QueryAll(ctx *context.Context) (user1 []User, er error) {
// keys, err := db.Rdbs.Keys(*ctx, "[1-9]*")).Result()
keys, err := db.Rdbs.Keys(*ctx, "*").Result()
fmt.Println("key=", keys)
if err != nil {
fmt.Println("db.Rdbs.Keys error:", err)
return
}
for _, key := range keys {
err = db.Rdbs.Get(*ctx, key).Scan(u)
if err != nil {
fmt.Print("Rdbs.Get error", err)
fmt.Println("key=", key)
return
}
fmt.Println("query=", *u)
user1 = append(user1, *u)

}
return
}

// 删除
func (u *User) DeleteUser(ctx *context.Context) (err bool) {
// 先判断key是否存在
if db.Rdbs.Exists(*ctx, u.Key).Val() == 1 {
_, er := db.Rdbs.Del(*ctx, u.Key).Result()
if er != nil {
fmt.Println("DeleteUser error: ", err)
return false
}
return true
}
return false
}

// 修改
func (u *User) UpdateUser(ctx *context.Context) (err error) {
// 先判断key是否存在
if db.Rdbs.Exists(*ctx, u.Key).Val() == 1 {
// 必须转为[]byte, redis不支持直接存结构体
u1, _ := json.Marshal(u)
_, err = db.Rdbs.Set(*ctx, u.Key, u1, 0).Result()
if err != nil {
fmt.Println("UpdateUser error:", err)
return
}
}
return
}


  • api/users.go 调用model层代码
1
2
3
4
5
6
7
8
9
10
11
12
13
14
15
16
17
18
19
20
21
22
23
24
25
26
27
28
29
30
31
32
33
34
35
36
37
38
39
40
41
42
43
44
45
46
47
48
49
50
51
52
53
54
55
56
57
58
59
60
61
62
63
64
65
66
67
68
69
70
71
72
73
74
75
76
77
78
79
80
81
82
83
84
85
86
87
88
89
90
91
92
93
94
95
96
97
98
99
100
101
102
103
104
105
106
107
108
109
110
111
112
113
114
115
116
117
118
119
120
121
122
123
124
125
126
127
128
129
130
131
package api

import (
"context"
"fmt"
"net/http"

"example.com/goRedis/models"
"github.com/gin-gonic/gin"
)

func UserAdd(c *gin.Context, ctx *context.Context) {
fmt.Println("add=", c)
var user models.User
if c.Bind(&user) == nil { //把客户端格式传过来的数据绑定到结构体user中去
fmt.Println("data=", user)
err := user.Add(ctx) // 调用model层的对应方法
if err != nil {

c.JSON(http.StatusOK, gin.H{
"msg": "新增失败",
"code": -1,
})

} else {
c.JSON(http.StatusOK, gin.H{
"msg": "新增成功",
"code": 1,
})
}
} else {
c.JSON(400, gin.H{"JSON=== status": "binding JSON error!"})
}
}

func UserGet(c *gin.Context, ctx *context.Context, key string) {
// 接受key
users := models.User{
Key: key,
}
if c.Bind(&users) == nil {
users, err := users.GetUser(ctx)
if err != nil {

c.JSON(http.StatusOK, gin.H{
"msg": "获取失败",
"code": -1,
"user": users,
})

} else {
c.JSON(http.StatusOK, gin.H{
"msg": "获取成功",
"code": 1,
"user": users,
})
}
} else {
c.JSON(400, gin.H{"JSON=== status": "binding JSON error!"})
}
}

func UserAll(c *gin.Context, ctx *context.Context) {
var user models.User
if c.Bind(&user) == nil {
users, err := user.QueryAll(ctx)
if err != nil {

c.JSON(http.StatusOK, gin.H{
"msg": "获取失败",
"code": -1,
"user": users,
})

} else {
c.JSON(http.StatusOK, gin.H{
"msg": "获取成功",
"code": 1,
"user": users,
})
}
} else {
c.JSON(400, gin.H{"JSON=== status": "binding JSON error!"})
}
}

func UserDel(c *gin.Context, ctx *context.Context) {
var user models.User
if c.Bind(&user) == nil {
err := user.DeleteUser(ctx)
fmt.Println("del=", err)
if !err {

c.JSON(http.StatusOK, gin.H{
"msg": "删除失败1",
"code": -1,
})

} else {
c.JSON(http.StatusOK, gin.H{
"msg": "删除成功1",
"code": 1,
})
}
} else {
c.JSON(400, gin.H{"JSON=== status": "binding JSON error!"})
}
}

func UserUpdate(c *gin.Context, ctx *context.Context) {
var user models.User
if c.Bind(&user) == nil {
err := user.UpdateUser(ctx)
if err != nil {

c.JSON(http.StatusOK, gin.H{
"msg": "修改失败",
"code": -1,
})

} else {
c.JSON(http.StatusOK, gin.H{
"msg": "修改成功",
"code": 1,
})
}
} else {
c.JSON(400, gin.H{"JSON=== status": "binding JSON error!"})
}
}

  • main.go 代码
1
2
3
4
5
6
7
8
9
10
11
12
13
14
15
16
17
18
19
20
21
22
23
24
25
26
27
28
29
30
31
32
33
34
35
package main

import (
"context"

"example.com/goRedis/api"
"example.com/goRedis/db"
"github.com/gin-gonic/gin"
)

func main() {
ctx := context.Background()
db.InitRedis(ctx)
defer db.Close()
r := gin.Default()
r.POST("/userAdd", func(c *gin.Context) {
api.UserAdd(c, &ctx)
})
r.GET("/userAll", func(c *gin.Context) {
api.UserAll(c, &ctx)
})
r.GET("/userGet/:key", func(c *gin.Context) {
key := c.Param("key")

api.UserGet(c, &ctx, key)
})
r.POST("/userUpdate", func(c *gin.Context) {
api.UserUpdate(c, &ctx)
})
r.POST("/userDel", func(c *gin.Context) {
api.UserDel(c, &ctx)
})
r.Run(":8000")
}

客户端

  • 使用python调用服务端代码
1
2
3
4
5
6
7
8
9
10
11
12
13
14
15
16
17
data ={"name": "test11", "password": "1123456", "id": 1, "key": "t_key1"}
resp = requests.post("http://127.0.0.1:8000/userAdd", json=data)
print(resp.text)
resp = requests.get("http://127.0.0.1:8000/userGet/t_key2")
print(resp.text)

resp = requests.get("http://127.0.0.1:8000/userAll")
print(resp.text)


data ={"name": "test1131", "password": "123456811", "id": 111, "key": "t_key21"}
resp = requests.post("http://127.0.0.1:8000/userUpdate", json=data)
print(resp.text)

data ={"key": "t_key1"}
resp = requests.post("http://127.0.0.1:8000/userDel", json=data)
print(resp.text)

其他

说明

  • 重装系统后,电脑上搭建的很多东西用不了,简单记录
  • 本次系统win10

heox

  • 本地搭建了hexo的博客,其中主要用的是node,只要把node的安装目录设置到环境变量中即可
  • 然后再博客的目录,执行hexo cl && hexo g && hexo s执行成功
  • 发现使用hexo d 提交到服务器后,内容没有变化,需要如下设置
1
2
3
git config --global user.email '284772894@qq.com'
# 然后提交到服务器
hexo cl && hexo g && hexo d

mysql

  • 环境变量设置好了mysql的根目录后,直接开启服务提示无效
1
2
3
C:\Users\Administrator>net start mysqld
服务名无效。

  • 分别执行如下操作
1
2
3
4
5
6
7
8
9
# 将mysql服务注册到win服务中
C:\Users\Administrator>mysqld --initialize
# 安装服务
C:\Users\Administrator>mysqld --install
Service successfully installed.
# 启动服务
C:\Users\Administrator>net start mysql
MySQL 服务正在启动 .
MySQL 服务已经启动成功。
  • 最终用heidisql连接数据库成功,库里面的数据正常

python

  • 直接在环境变量中设置python的根目录和Script目录
  • 设置pip下载为国内镜像
1
2
3
4
5
# 临时使用
pip install -i https://pypi.tuna.tsinghua.edu.cn/simple xxx
# 永久使用,清华镜像
C:\Users\Administrator>pip3 config set global.index-url https://pypi.tuna.tsinghua.edu.cn/simple
Writing to C:\Users\Administrator\AppData\Roaming\pip\pip.ini
  • 测试
1
2
3
C:\Users\Administrator>pip install pip -U
Looking in indexes: https://pypi.tuna.tsinghua.edu.cn/simple
Requirement already satisfied: pip in d:\app\python37\lib\site-packages (23.1.2)

vue

  • 需要安装node.js,安装hexo 时已经安装了node.js
  • 打开本地的Microsoft VS Code IDE 然后打开本地项目
  • 打开终端执行安装依赖
1
npm install
  • 运行代码
1
npm run serve

typora

  • 下载并解压typora1.2.4-Windows(破解包).7z

  • 安装后,不打开typora

  • 使用app.asar 文件替换typora_home/resources 中文件

  • 打开typora输入任意邮箱,序列号输入:E8Q9Y5-KXMTL5-7578SL-4S5XKS

go

  • 设置go_home\bin到环境变量中
  • 启动本地的Microsoft VS Code IDE,打开扩展安装中文
  • 打开go项目文件夹,终端中输入:go run main.go

说明

  • FISCO BCOS是由国内企业主导研发、对外开源、安全可控的企业级金融联盟链底层平台,由金链盟开源工作组协作打造,并于2017年正式对外开源
  • 因为需要使用python sdk来操作FISCO BCOS,官方只支持FISCO BCOS2.0

概念介绍

  • 智能合约:可以理解为逻辑代码,比如此次实例中我的智能合约代码就是一个sol文件中
  • 区块链网络:智能合约的代码若要运行,就要放在区块链网络上执行

环境搭建

区块链网络

  • 云服务器搭建成功后,发现无法外网访问,看这里的文档说明云主机的公网IP均为虚拟IP造成的

  • 也就是区块链的服务端,可以参考这里

  • 不启用国密

Python SDK

  • 主要用来操作FISCO BCOS搭建的区块链网络

  • 环境搭建参考这里

  • 我用的win10,使用的python版本为3.7.9,没有使用虚拟环境

  • 没有安装Microsoft Visual C++ 14.0

  • client_config.py 为配置文件:

1
2
channel_host = "XXXXXX.121.XXX"  # 填入channel通信ip
channel_port = 20200 # 节点的channel 端口
  • 把区块链网络层那边产生的证书文件放在bin目录下,一般为:
1
2
channel_ca = "bin/ca.crt"

编写代码

  • 合约文件一般放在contracts目录中,如contracts\helloword.sol
  • 合约代码采用的solidity的语法
1
2
3
4
5
6
7
8
9
10
11
12
13
14
15
16
17
18
pragma solidity ^0.4.24;

contract HelloWorld{
string name;
event onset(string newname);
constructor() public{
name = "Hello, World!";
}

function get() constant public returns(string){
return name;
}

function set(string n) public{
emit onset(n);
name = n;
}
}
  • 编写部署合约文件,调用合约函数等
1
2
3
4
5
6
7
8
9
10
11
12
13
14
15
16
17
18
19
20
21
22
23
24
25
26
27
28
29
30
31
32
33
34
35
36
37
38
39
40
41
42
43
44
45
46
47
48
49
50
51
52
53
54
55
56
57
58
59
60
61
62
63

from client.contractnote import ContractNote
from client.bcosclient import BcosClient
import os
from client.datatype_parser import DatatypeParser
from client.common.compiler import Compiler
from client_config import client_config

# 从文件加载abi定义

PATH = lambda p: os.path.abspath(
os.path.join(os.path.dirname(__file__), p)
)

demo_config = client_config
_sol = PATH("./contracts/HelloWord.sol") # 合约文件
_api = PATH("./contracts/HelloWord.abi")

if os.path.isfile(demo_config.solc_path) or os.path.isfile(demo_config.solcjs_path):
Compiler.compile_file(_sol)
# Compiler.compile_file(SimpleInfo_sol)
_bin = PATH("./contracts/HelloWord.bin")
abi_file = _api
data_parser = DatatypeParser()
data_parser.load_abi_file(abi_file)
contract_abi = data_parser.contract_abi


def deploy():
client = BcosClient()
print(client.getinfo())
# 部署合约
print("\n>>Deploy:----------------------------------------------------------")
with open(_bin, 'r') as load_f:
contract_bin = load_f.read()
load_f.close()
result = client.deploy(contract_bin)
print("deploy", result)
print("new address : ", result["contractAddress"])
contract_name = os.path.splitext(os.path.basename(abi_file))[0]
memo = "tx:" + result["transactionHash"]
# 把部署结果存入文件备查
ContractNote.save_address_to_contract_note("demo", contract_name,
result["contractAddress"])
client.finish()
def call():
client = BcosClient()
# stat = StatTool.begin()
# 调用一下call,获取数据
print("\n>>Call:------------------------------------------------------------------------")
to_address = "xxxxxxxx"

client.sendRawTransactionGetReceipt(to_address,contract_abi,"set",["hi"])

data = client.call(to_address, contract_abi, "get")
print(data)
client.finish()


if __name__ == "__main__":
deploy()
# call()

  • client.deploy 部署合约
  • sendRawTransactionGetReceipt 执行修改操作
  • call 执行查询操作

其他实例

1
2
3
4
5
6
7
8
9
10
11
12
13
14
15
16
17
18
19
20
21
22
23
24
25
26
27
28
29
30
31
32
33
34
35
36
37
38
39
40
41
42
43
44
45
46
47
48
49
50
51
52
53
54
55
56
57
58
59
60
61
62
63
// pragma solidity ^0.6.3;
pragma solidity ^0.4.24;
pragma experimental ABIEncoderV2;

contract TestStruct {

struct User {
string name; // 对应的是item_id
string user_name;
string issue_date;
string start_date;
string end_date;
}

event onadd(string newname);
event onadduser(string newname,User u);
event onaddusers(uint256 len,User[] u);

mapping (string => User) users;

constructor() public
{
// User memory u = User("alice",10001, "2012-12-01", "start");
User memory u = User("100001","lisa", "2012-12-01", "start", "end");
addUser(u);
}


function addUser (User memory _user) public {

addbyname(_user.name,_user);


}

function addbyname (string memory name,User memory _user) public {

users[name] = _user;
emit onadd(name);
emit onadduser(name,_user);

}

function addUsers (User [] memory _users) public {

for (uint i = 0; i < _users.length; i++) {
//users[_users[i].name] = _users[i];
addUser(_users[i]);
}
emit onaddusers(_users.length,_users);
}

function getUser (string memory username) public view returns (User memory) {

//bytes32 hash = keccak256(abi.encode(username));
return users[username];
}
event on_putbytes(string n,bytes32 b);
function putbytes(string memory uname,bytes32 br) public
{
emit on_putbytes(uname,br);
}
}

说明

  • 本次搭建环境为:win10, go 1.20.4

安装

  • 新建并初始化项目
1
2
3
4
cd E:\proj\gowork
mkdir studyGin
cd studyGin
go mod init example.com/myGin
  • 下载并安装 gin
1
E:\proj\gowork\studyGin> go get -u github.com/gin-gonic/gin
  • 在vscode中编写测试代码
1
2
3
4
5
6
7
8
9
10
11
12
13
14
15
16
17
18
19
20
21
package main

import (
"net/http"

"github.com/gin-gonic/gin"
)

func main() {
// 1.创建路由
r := gin.Default()
// 2.绑定路由规则,执行的函数
// gin.Context,封装了request和response
r.GET("/", func(c *gin.Context) {
c.String(http.StatusOK, "hello World!")
})
// 3.监听端口,默认在8080
// Run("里面不指定端口号默认为8080")
r.Run(":8000")
}

  • 运行
1
PS E:\proj\gowork\studyGin> go run .\main.go

image-20230621153207713

项目结构

  • 分别新建文件夹,查看到E:\proj\gowork\studyGin>tree /F文件结构如下:
1
2
3
4
5
6
7
8
9
10
11
go.mod
go.sum
│ main.go

├─apis # 存放具体的业务逻辑,比如users.go中放的增删改查的逻辑
├─database # 存放数据库的相关配置
├─middleware # 存放中间件的内容
│ ├─jwt
│ └─middleware
├─models # 存放结构体的文件
└─routers # 存放路由,比如get,post等对应关系

代码结构

  • database/mysql.go数据库连接
1
2
3
4
5
6
7
8
9
10
11
12
13
14
15
16
17
18
19
20
21
22
23
24
25
26
27
28
29
package database

//安装gorm
//go get gorm.io/gorm
// 安装mysql驱动
//go get gorm.io/driver/mysql
import (
"fmt"

"gorm.io/driver/mysql"
"gorm.io/gorm"
)

var Db *gorm.DB

func InitDb() {
dsn := "root:123456@tcp(127.0.0.1:3306)/test?charset=utf8mb4&parseTime=True&loc=Local"
database, err := gorm.Open(mysql.Open(dsn), &gorm.Config{})
if err != nil {
fmt.Println("open mysql error:", err)
}
Db = database

}
func Close() {
sqlDB, _ := Db.DB()
sqlDB.Close()
}

  • models\users.go 存放的表结构,实现登录功能(对user实体类的逻辑处理)
1
2
3
4
5
6
7
8
9
10
11
12
13
14
15
16
17
18
19
20
21
22
23
24
25
26
27
28
29
30
31
32
33
34
35
package models

import (
"fmt"

"example.com/myGin/database"
)

type User struct {
Name string `form:"name",json:"name",bingding:"required",gorm:"unique;not null"`
Password string `form:"password",json:"password",bingding:"required"gorm:"NOT NULL"`
Id int `form:"id",gorm:"PRIMARY_KEY"`
}

// 登录
func (u *User) Login() (user1 User, err error) {
obj := database.Db.Where("name=? and password=?", u.Name, u.Password).First(&user1)
if err = obj.Error; err != nil {
fmt.Printf("这是登陆错误 %v 和 %T", err, err)
return
}
fmt.Println(user1)
return

}

// 获取用户列表
func (u *User) UserList() (users []User, err error) {
if err = database.Db.Find(&users).Error; err != nil {
return
}
return

}

注意func (u *User) UserList这里的用法,外面的函数要调用时,必须用User.UserList的方式进行调用

  • api/users.go 主要对models\users.go 代码进行调用,并把json数据返回给前端
1
2
3
4
5
6
7
8
9
10
11
12
13
14
15
16
17
18
19
20
21
22
23
24
25
26
27
28
29
30
31
32
33
34
35
36
37
38
39
40
41
42
43
44
45
46
47
48
49
50
51
52
53
54
55
package apis

import (
"net/http"

"example.com/myGin/models"
"github.com/gin-gonic/gin"
)


func UserLogin(c *gin.Context) {
var user models.User
// c.ShouldBindJSON
if c.Bind(&user) == nil { //把客户端格式传过来的数据绑定到结构体user中去
msg, err := user.Login() // 调用model层的对应方法
if err != nil {
if err.Error() == "record not found" {
c.JSON(http.StatusOK, gin.H{
"msg": "用户不存在",
"user": nil,
})
} else {
c.JSON(http.StatusOK, gin.H{
"msg": "登陆错误",
"user": nil,
})

}

} else {
c.JSON(http.StatusOK, gin.H{
"msg": "登陆成功",
"user": msg,
})
}
} else {
c.JSON(400, gin.H{"JSON=== status": "binding JSON error!"})
}

}

// 获取用户列表
func GetUserList(c *gin.Context) {
var user models.User
users, err := user.UserList()
if err != nil {
fmt.Println("get user list error:", err)
}
c.JSON(http.StatusOK, gin.H{
"msg": users,
})
}


  • routers/router.go 对外的路由处理,比如http,get方法的处理
1
2
3
4
5
6
7
8
9
10
11
12
13
14
15
package routers

import (
"example.com/myGin/apis"
"github.com/gin-gonic/gin"
)

func InitRouter() *gin.Engine {

router := gin.Default()
router.POST("/login", apis.UserLogin)
router.GET("/GetUserList", apis.GetUserList)
return router
}

  • main.go 代码入口
1
2
3
4
5
6
7
8
9
10
11
12
13
14
15
16
package main

import (
"example.com/myGin/database"
"example.com/myGin/routers"
)

func main() {
database.InitDb() // 初始化数据库
defer database.Close()
router := routers.InitRouter() //指定路由
router.Run(":8000") //在8000端口上运行

}


  • 运行main.go,启动服务器
1
2
3
4
5
6
7
PS E:\proj\gowork\studyGin> go run .\main.go

...
GIN-debug] POST /login --> example.com/myGin/apis.UserLogin (3 handlers)
[GIN-debug] [WARNING] You trusted all proxies, this is NOT safe. We recommend you to set a value.
Please check https://pkg.go.dev/github.com/gin-gonic/gin#readme-don-t-trust-all-proxies for details.
[GIN-debug] Listening and serving HTTP on :8000

go编写客户端

  • client\client.go用go编写客户端代码,包名为main,传递参数为json
1
2
3
4
5
6
7
8
9
10
11
12
13
14
15
16
17
18
19
20
21
22
23
24
25
26
27
28
29
30
31
32
33
34
35
36
37
38
39
40
41
42
43
44
45
46
47
48
49
50
51
52
53
54
55
56
57
58
59
60
61
62
63
64
65
66
67
68
69
70
71
72
73
74
75
76
77
78
79
80
81
82
83
84
85
86
87
88
89
90
91
92
package main

import (
"bytes"
"encoding/json"
"fmt"
"io/ioutil"
"net/http"
"time"
)

// 1、测试post请求的结构体
func TestPostLogin() {
reqMap := map[string]interface{}{
"name": "test1",
"password": "123456",
}

body, err := json.Marshal(reqMap)
if err != nil {
fmt.Println("TestPostReq json.Marshal err:", err)
return
}

url := "http://127.0.0.1:8000/login"

req, err := http.NewRequest(http.MethodPost, url, bytes.NewReader(body))
if err != nil {
fmt.Println("TestPostReq http.NewRequest err:", err)
return
}

req.Header.Set("Content-Type", "application/json")

client := &http.Client{Timeout: 5 * time.Second} // 设置请求超时时长5s
resp, err := client.Do(req)
if err != nil {
fmt.Println("TestPostReq http.DefaultClient.Do() err: ", err)
return
}
defer resp.Body.Close()

respBody, err := ioutil.ReadAll(resp.Body)
if err != nil {
fmt.Println("TestPostReq ioutil.ReadAll() err: ", err)
return
}
fmt.Println("respBody: ", string(respBody))

rsp := make(map[string]interface{})
err = json.Unmarshal(respBody, &rsp)
if err != nil {
fmt.Println("TestPostReq json.Unmarshal() err: ", err)
return
}
fmt.Printf("rsp: %+v", rsp)

// 最后经过字段筛选后,再序列化成json格式即可
// result, err := json.Marshal(rsp)
// if err != nil {
// fmt.Println("TestPostReq json.Marrshal() err2: ", err)
// return
// }
// fmt.Println(string(result))
}

func TestGetUserList() {
resp, err := http.Get("http://127.0.0.1:8000/GetUserList")
if err != nil {
fmt.Println("http get error:", err)
return
}
defer resp.Body.Close()
buf := make([]byte, 1024) // 创建一个切片,用例接受服务器返回的数据
for {
m, err := resp.Body.Read(buf)
if err != nil && err != io.EOF {
fmt.Println("resp.Body.Read error:", err)
return
}
res := string(buf[:m])
fmt.Println("get server content,", res)
break

}
}

func main() {
TestPostLogin()
TestGetUserList()
}

  • 运行client.go
1
2
3
4
5
PS E:\proj\gowork\studyGin> go run .\client\client.go
respBody: {"msg":"登陆成功","user":{"Name":"test1","Password":"123456","Id":3}}
rsp: map[msg:登陆成功 user:map[Id:3 Name:test1 Password:123456]]

get server content, {"msg":[{"Name":"test1","Password":"123456","Id":3},{"Name":"test2","Password":"1234567","Id":4}]}

python 发起请求

1
2
3
4
5
6
7
8
9
import requests

data ={"name": "test1", "password": "123456"}
resp = requests.post("http://127.0.0.1:8000/login", data=data)
print(resp.text)

resp2 = requests.get("http://127.0.0.1:8000/GetUserList")
print(resp2.text)

  • 得到结果如下
1
2
{"msg":"登陆成功","user":{"Name":"test1","Password":"123456","Id":3}}
{"msg":[{"Name":"test1","Password":"123456","Id":3},{"Name":"test2","Password":"1234567","Id":4}]}

HTML 渲染

  • gin 支持使用 LoadHTMLGlob() 或者 LoadHTMLFiles() 对html进行渲染

用户列表

  • 新建一个目录和文件:template\user\list.tmpl代码如下
1
2
3
4
5
6
7
8
9
10
11
12
13
14
15
16
<html>
<head>
<title>用户列表</title>
</head>
<body>
<div>
<p>列表数据:</p>
<!-- 定义一个 结构体切片 -->
{{ $userList := . }}

{{ range $index,$v := $userList.users }}
<p>{{ $index }}--{{ $v.Name }}--{{ $v.Password }}</p>
{{ end }}
</div>
</body>
</html>
  • 初始化路由器代码那里需要修改,新增加入加载 HTML 模板文件
1
2
3
4
5
6
7
8
9
10
11
12
13
14
15
16
17
18
// routers/router.go
package routers

import (
"example.com/myGin/apis"
"github.com/gin-gonic/gin"
)

func InitRouter() *gin.Engine {

router := gin.Default()

router.POST("/login", apis.UserLogin)
// 加载 HTML 模板文件
router.LoadHTMLGlob("template/user/*")
router.GET("/GetUserList", apis.GetUserList)
return router
}
  • apis.GetUserList 中,返回的数据修改为采用html
1
2
3
4
5
6
7
8
9
10
11
12
13
14
15
16
// apis/user.go

// 获取用户列表
func GetUserList(c *gin.Context) {
var user models.User
users, err := user.UserList()
if err != nil {
fmt.Println("get user list error:", err)
}
// c.JSON(http.StatusOK, gin.H{
// "msg": users,
// })
c.HTML(http.StatusOK, "list.tmpl", gin.H{
"users": users,
})
}
  • 运行服务器端
1
PS E:\proj\gowork\studyGin> go run .\main.go
  • 打开浏览器,查看到结果

image-20230626103441913

登录验证

  • 通过上面的实例,缺少一个登录验证的流程,一个典型的验证流程为:登录成功–生成token–获取用户列表(检查token存在,则获取成功,否则获取失败)

  • 中间件中middleware\jwt\jwt.go 对登录后的token进行处理和验证

1
2
3
4
5
6
7
8
9
10
11
12
13
14
15
16
17
18
19
20
21
22
23
24
25
26
27
28
29
30
31
32
33
34
35
36
37
38
39
40
41
42
43
44
45
46
47
48
49
50
51
52
53
54
55
56
57
58
59
60
61
62
63
64
65
66
67
68
69
70
71
72
73
74
75
76
77
78
79
80
81
82
83
84
85
86
87
88
89
90
91
92
93
94
95
96
97
98
99
100
101
102
103
104
105
106
107
108
109
110
111
112
113
114
115
116
117
118
119
120
121
122
123
124
125
126
127
128
129
130
131
132
package jwt

import (
"errors"
"fmt"
"log"
"net/http"
"time"

"github.com/golang-jwt/jwt/v5" // go get -u github.com/golang-jwt/jwt/v5

"github.com/gin-gonic/gin"
)

// JWTAuth 中间件,检查token
func JWTAuth() gin.HandlerFunc {
return func(c *gin.Context) {
// //获取到请求头中的token
token := c.Request.Header.Get("token")
if token == "" {
c.JSON(http.StatusOK, gin.H{
"status": -1,
"msg": "请求未携带token无权限访问",
})
c.Abort()
return
}

log.Print("get token: ", token)

j := NewJWT()
// parseToken 解析token包含的信息
claims, err := j.ParseToken(token)
fmt.Println("claims", claims)
if err != nil {
if err == TokenExpired {
c.JSON(http.StatusOK, gin.H{
"status": -1,
"msg": "授权已过期",
})
c.Abort()
return
}
c.JSON(http.StatusOK, gin.H{
"status": -1,
"msg": err.Error(),
})
c.Abort()
return
}
// 继续交由下一个路由处理,并将解析出的信息传递下去
c.Set("claims", claims)
}
}

// JWT 签名结构
type JWT struct {
SigningKey []byte
}

// 一些常量
var (
TokenExpired error = errors.New("Token is expired")
TokenNotValidYet error = errors.New("Token not active yet")
TokenMalformed error = errors.New("That's not even a token")
TokenInvalid error = errors.New("Couldn't handle this token:")
SignKey string = "newtrekWang"
)

// 载荷,可以加一些自己需要的信息
type CustomClaims struct {
ID int `json:"userId"`
Name string `json:"name"`
Password string `json:"password"`
jwt.RegisteredClaims // 设置过期时间
}

// 新建一个jwt实例
func NewJWT() *JWT {
return &JWT{
[]byte(GetSignKey()),
}
}

// 获取signKey
func GetSignKey() string {
return SignKey
}

// 这是SignKey
func SetSignKey(key string) string {
SignKey = key
return SignKey
}

// CreateToken 生成一个token
func (j *JWT) CreateToken(claims CustomClaims) (string, error) {
token := jwt.NewWithClaims(jwt.SigningMethodHS256, claims)
return token.SignedString(j.SigningKey)
}

// 解析Tokne
func (j *JWT) ParseToken(tokenString string) (*CustomClaims, error) {
token, err := jwt.ParseWithClaims(tokenString, &CustomClaims{}, func(token *jwt.Token) (interface{}, error) {
return j.SigningKey, nil
})
if err != nil {
return nil, err
}
if claims, ok := token.Claims.(*CustomClaims); ok && token.Valid {
return claims, nil
}
return nil, TokenInvalid
}

// 更新token
func (j *JWT) RefreshToken(tokenString string) (string, error) {

token, err := jwt.ParseWithClaims(tokenString, &CustomClaims{}, func(token *jwt.Token) (interface{}, error) {
return j.SigningKey, nil
})
if err != nil {
return "", err
}
if claims, ok := token.Claims.(*CustomClaims); ok && token.Valid {
claims.RegisteredClaims.ExpiresAt = jwt.NewNumericDate(time.Now().Add(time.Hour * 24))

return j.CreateToken(*claims)
}
return "", TokenInvalid
}

  • apis/user.go 加入生成token代码
1
2
3
4
5
6
7
8
9
10
11
12
13
14
15
16
17
18
19
20
21
22
23
24
25
26
27
28
29
30
31
32
33
34
35
36
37
38
39
40
41
42
43
44
45
46
47
48
49
50
import (
...
"example.com/myGin/middleware/jwt" // 引用中间件
"example.com/myGin/models"
"github.com/gin-gonic/gin"
// 引用jwt-v5
jwtgo "github.com/golang-jwt/jwt/v5" // go get -u github.com/golang-jwt/jwt/v5
)

// 生成token
func GengerateToken(c *gin.Context, user models.User) {
// 调用中间件的初始化秘钥
j := &jwt.JWT{
[]byte("newtrekWang"), // 秘钥
}
claims := jwt.CustomClaims{
user.Id,
user.Name,
user.Password,
jwtgo.RegisteredClaims{
ExpiresAt: jwtgo.NewNumericDate(time.Now().Add(time.Hour * 24)), //定义过期时间为24小时
Issuer: "newtrekWang", //签名的发行者
},
}

token, err := j.CreateToken(claims)

if err != nil {
c.JSON(http.StatusOK, gin.H{
"status": -1,
"msg": err.Error(),
})
return
}

log.Println(token)
// 登录成功后的结构体数据
data := LoginResult{
User: user,
Token: token,
}
c.JSON(http.StatusOK, gin.H{
"status": 0,
"msg": "登录成功!",
"data": data,
})
return

}

  • routers\router.go 对请求进行验证
1
2
3
4
5
6
7
8
9
10
11
12
13
14
15
16
17
18
19
20
21
22
package routers

import (
"example.com/myGin/apis"
"example.com/myGin/middleware/jwt"
"github.com/gin-gonic/gin"
)

func InitRouter() *gin.Engine {

router := gin.Default()
// 这样使用,并不能进行token验证
// v1 := router.Group("/v1")
// v1.Use(jwt.JWTAuth())
router.POST("/login", apis.UserLogin)
// 加载 HTML 模板文件
router.LoadHTMLGlob("template/user/*")
// 对接口进行token验证
router.GET("/GetUserList", jwt.JWTAuth(), apis.GetUserList)
return router

}
  • 运行服务器端
1
PS E:\proj\gowork\studyGin> go run .\main.go

客户端发起请求

  • 采用python,不带token值,报错
1
2
3
4
5
resp2 = requests.get("http://127.0.0.1:8000/GetUserList")
print(resp2.text)

{"msg":"请求未携带token无权限访问","status":-1}

  • 登录后,读取token,填入token发送请求
1
2
3
4
5
6
7
8
9
10
11
12
13
14
import requests
import json
data ={"name": "test1", "password": "123456"}
resp = requests.post("http://127.0.0.1:8000/login", data=data)
dic = json.loads(resp.text)
token = dic["data"]["Token"]
header = {"token": token}

resp2 = requests.get("http://127.0.0.1:8000/GetUserList", headers=header)
print(resp2.text)

<p>列表数据:</p>
<p>0--test1--123456</p>
<p>1--test11--1234567</p>
  • 直接传送正确的token,获取数据正常
1
2
3
4
5
6
7
8
9
token = "yJhbGciOiJIUzI1Ni......"
header = {"token": token}

resp2 = requests.get("http://127.0.0.1:8000/GetUserList", headers=header)
print(resp2.text)

<p>列表数据:</p>
<p>0--test1--123456</p>
<p>1--test11--1234567</p>

注意

  • 代码来自gin框架实例,其中jwt的验证这里,我用的v5版本,博主用的v4,

接口

  • 在Go语言中接口(interface)是一种类型,一种抽象的类型。
  • interface(接口)是golang最重要的特性之一,实现多态。Interface类型可以定义一组方法,但是这些不需要实现。并且interface不能包含任何变量
  • 本篇主要来源这里

接口定义和实现

接口定义

1
2
3
4
5
6
// hello_work\iinterface\studyInterface.go
/ 定义一个动物接口,接口中有个方法名称,但是不具体实现
type Animal interface {
Say()
GetName() string //返回内容为string
}

接口实现

  • 一个对象只要全部实现了接口中的方法,那么就实现了这个接口。换句话说,接口就是一个需要实现的方法列表。
1
2
3
4
5
6
7
8
9
10
11
12
13
14
15
16
17
18
19
20
21
22
23
24

type Dog struct {
Name string
}

type Cat struct {
Name string
}

// 对应实现了接口中的方法
func (d Dog) Say() {
fmt.Println("汪汪汪")
}
// 对应实现了接口中的方法
func (d Dog) GetName() string {
return d.Name
}

func (c Cat) Say() {
fmt.Println("喵喵喵")
}
func (c Cat) GetName() string {
return c.Name
}

完整代码如下:

1
2
3
4
5
6
7
8
9
10
11
12
13
14
15
16
17
18
19
20
21
22
23
24
25
26
27
28
29
30
31
32
33
34
35
36
\\ hello_work/iinterface/studyInterface.go
package iinterface

import "fmt"

// 定义一个动物接口,接口中有个方法
type Animal interface {
Say()
GetName() string
}

// 如下开始,为实现接口中的方法

type Dog struct {
Name string
}

type Cat struct {
Name string
}

// 对应实现了接口中的方法
func (d Dog) Say() {
fmt.Println("汪汪汪")
}
func (d Dog) GetName() string {
return d.Name
}

func (c Cat) Say() {
fmt.Println("喵喵喵")
}
func (c Cat) GetName() string {
return c.Name
}

接口类型变量

  • 接口类型变量能够存储所有实现了该接口的实例
1
2
3
4
5
6
7
8
9
10
11
12
13
14
15
16
17
18
19
20
21
22
23
24
25
26
27
28
// hello_work\main.go
package main

import (
"fmt"

"example.com/hello_work/hello_work/iinterface"
)

func main() {
// 声明一个Animal类型的变量animal
var animal iinterface.Animal
// 实例化一个dog结构体
dog := iinterface.Dog{Name: "旺财"}
// 可以把dog实例直接赋值给变量animal
animal = dog
dogName := animal.GetName()
fmt.Println(dogName)
animal.Say()

cat := iinterface.Cat{Name: "工程喵"}
animal = cat
catName := animal.GetName()
fmt.Println(catName)
animal.Say()

}

  • 运行结果
1
2
3
4
5
PS E:\proj\gowork> go run .\hello_work\main.go
旺财
汪汪汪
工程喵
喵喵喵

注意,如果实现了接口中的方法(studyInterface.go)用的是指针,如func (d *Dog),那么对应实例化时也要传入指针,dog := &iinterface.Dog{Name: “旺财”}

空接口

  • 空接口是指没有定义任何方法的接口。因此任何类型都实现了空接口。

  • 空接口类型的变量可以存储任意类型的变量。

实例

  • 可以作为字符串,数字,bool类型等
1
2
3
4
5
6
7
8
9
10
11
12
13
func main() {
// 定义一个空接口x
var x interface{}
s := "pprof.cn"
x = s
fmt.Printf("type:%T value:%v\n", x, x)
i := 100
x = i
fmt.Printf("type:%T value:%v\n", x, x)
b := true
x = b
fmt.Printf("type:%T value:%v\n", x, x)
}
  • 空接口作为函数的参数
1
2
3
4
// 空接口作为函数参数
func show(a interface{}) {
fmt.Printf("type:%T value:%v\n", a, a)
}
  • 空接口作为map的值
1
2
3
4
5
6
// 空接口作为map值
var studentInfo = make(map[string]interface{})
studentInfo["name"] = "李白"
studentInfo["age"] = 18
studentInfo["married"] = false
fmt.Println(studentInfo)

分析网站

image-20230620190153496

  • 点击下载图片时,经过分析最终的下载地址的n数量减一,为正则提取或者图片查找做准备http://i.52desktop.cn:81/upimg/allimg/{n}/201912415221023477802.jpg

image-20230620190505925

单线程

  • hello_work\craw\Craw1.go
1
2
3
4
5
6
7
8
9
10
11
12
13
14
15
16
17
18
19
20
21
22
23
24
25
26
27
28
29
30
31
32
33
34
35
36
37
38
39
40
41
42
43
44
45
46
47
48
49
50
51
52
53
54
55
56
57
58
59
60
61
62
63
64
65
66
67
68
69
70
71
72
73
74
75
76
77
78
79
80
81
82
83
84
85
86
87
88
89
90
91
92
93
94
// hello_work\craw\Craw1.go
package crawl

import (
"bufio"
"fmt"
"io"
"io/ioutil"
"net/http"
"os"
"path"
"regexp"
"strconv"
"strings"
"time"
)

var (
// 正则查找图片的地址
reImg = `http://i.52desktop.cn:81/upimg/allimg/[^"]+?(\.((jpg)|(png)|(jpeg)|(gif)|(bmp)))`
)

// 读取链接中所有的内容
func GetPageStr(url string) (pageStr string) {

resp, err := http.Get(url)
if err != nil {
fmt.Println("http.Get error", err)
return
}
defer resp.Body.Close()
// 读取页面内容
pagebytes, err := ioutil.ReadAll(resp.Body)
if err != nil {
fmt.Println("ioutil.ReadAll error", err)
return
}
// 字节转换为字符串
pageStr = string(pagebytes)
return pageStr
}
// 下载图片,核心内容是获取图片的reader、write对象
func downloadImg(savePath string, url string) error {

v, err := http.Get(url)
if err != nil {
fmt.Println("http.Get error", err)
return err
}
defer v.Body.Close()
fileName := path.Base(url) // 获取文件名
// 获得get请求响应的reader对象
reader := bufio.NewReaderSize(v.Body, 32*1024)
// 创建单个文件保存下来
file, err := os.Create(savePath + fileName)
if err != nil {
fmt.Println("ioutil.WriteFile error", err)
return err
}
// // 获得文件的writer对象
writer := bufio.NewWriter(file)

written, err := io.Copy(writer, reader)
if err != nil {
fmt.Println("io.Copy error", err)
return err
}
fmt.Println(fileName, "download is success, Total length:", written)
return nil

}
// 给main.go进行调用的外部地址
func GetCrawl1Img() {
start := time.Now()
for i := 2; i <= 21; i++ {
// 根据观察规则,发现下载图片地址网站
url := "http://www.52desktop.cn/html/DLZM/KPBZ/20191205/15898_" + strconv.Itoa(i) + ".html"
pageStr := GetPageStr(url)
re := regexp.MustCompile(reImg)
results := re.FindAllStringSubmatch(pageStr, -1) // -1 表示搜索所有可能的匹配项。
for _, result := range results {
if strings.Contains(result[0], "20191204") { // 过滤条件读取图片地址
downloadImg("E:\\proj\\gowork\\img\\", result[0])

}

}

}
elapse := time.Since(start)
fmt.Println("elapsed time is : ", elapse, "s")

}

  • hello_work/main.go
1
2
3
4
5
6
7
8
9
10
11
// hello_work/main.go
package main

import (
"example.com/hello_work/hello_work/crawl"
)

func main() {
crawl.GetCrawl1Img()
}

  • 调用,共下载了20张图片,耗时20秒
1
2
3
4
5
6
7
 E:\proj\gowork> go run .\hello_work\main.go
201912415221023477802.jpg download is success, Total length: 344218
201912415221026577803.jpg download is success, Total length: 342307
...
2019124152210921778021.jpg download is success, Total length: 340471
elapsed time is : 20.861619s

并发爬虫

思路

  • 初始化一个数据管道
  • 爬虫写出:创建多个协程用于添加图片
  • 任务统计协程:检查多个个任务是否都完成,完成则关闭数据管道
  • 下载协程:从管道里读取链接并下载

代码

  • hello_work/crawl/Crawl2.go
1
2
3
4
5
6
7
8
9
10
11
12
13
14
15
16
17
18
19
20
21
22
23
24
25
26
27
28
29
30
31
32
33
34
35
36
37
38
39
40
41
42
43
44
45
46
47
48
49
50
51
52
53
54
55
56
57
58
59
60
61
62
63
64
65
66
67
68
69
70
71
72
73
74
75
76
77
78
79
80
81
82
83
84
85
86
87
88
89
90
91
92
93
94
95
96
97
98
99
100
101
102
103
104
105
106
107
108
109
110
111
112
113
114
115
116
117
118
119
120
121
122
123
124
125
126
127
128
129
130
131
132
133
134
135
136
137
138
139
140
141
142
143
144
145
146
147
148
149
package crawl

import (
"fmt"
"io/ioutil"
"net/http"
"path"
"regexp"
"strconv"
"strings"
"sync"
"time"
)

var (
// 正则提取表达式
geReImg = `http://i.52desktop.cn:81/upimg/allimg/[^"]+?(\.((jpg)|(png)|(jpeg)|(gif)|(bmp)))`

// 存放图片链接的数据管道
chanImageUrls chan string
// 启动多个goroutine,sync.WaitGroup来实现goroutine的同步
waitGroup sync.WaitGroup
// 用于监控协程
chanTask chan string
// 监控协程总数
chanTaskCount = 23
// 监控当前的下载任务是否完成的总数
count int
)

// 爬取图片链接,获取当前页的所有图片链接
func getImgs(url string) (urls []string) {
pageStr := GetPageStr(url)
re := regexp.MustCompile(geReImg)
results := re.FindAllStringSubmatch(pageStr, -1) // -1 表示搜索所有可能的匹配项。
fmt.Printf("共找到%d条结果\n", len(results))
for _, result := range results {
url := result[0]
if strings.Contains(result[0], "20191204") { // 过滤条件读取图片地址
urls = append(urls, url)
// fmt.Println(url)

}
}
return urls

}

func getImgUrls(url string) {
urls := getImgs(url)
// 遍历切片里所有链接,存入数据管道
for _, url := range urls {
// 存放图片链接的数据管道,发送图片链接
chanImageUrls <- url
}
// 标识当前协程完成
// 每完成一个任务,写一条数据
// 用于监控协程知道已经完成了几个任务
chanTask <- url
waitGroup.Done()

}

// 任务统计
func CheckOk() {
for {
// 从chanTask中接收值并赋值给变量,url
url := <-chanTask
fmt.Printf("%s 完成了爬虫任务\n", url)
count++
// 任务统计个协程是否全部完成,完成了久关闭通道
// 因为的我循环起始地址的索引为2,所以这里减去2
if count == chanTaskCount-2 {
close(chanImageUrls)
break
}
}
waitGroup.Done()

}
func downloadFile(savePath string, url string) {

v, err := http.Get(url)
if err != nil {
fmt.Println("http.Get error", err)
return
}
defer v.Body.Close()
fileName := savePath + path.Base(url) // 获取文件名
bytes, err := ioutil.ReadAll(v.Body)
if err != nil {
fmt.Println("io.ReadAll error", err)
return
}
// 直接写入内容,比Crawl1.go代码更简单
err = ioutil.WriteFile(fileName, bytes, 0666)
if err != nil {
fmt.Println("ioutil.WriteFile error", err)
return
}
fmt.Println(fileName, " download is success")

}

// 下载协程,从hanImageUrls管道中读取链接下载,读取的数据来自于这里函数getImgUrls,对chanImageUrls的写入
func DownloadImg() {
for url := range chanImageUrls {
downloadFile("E:\\proj\\gowork\\img\\", url)
}
waitGroup.Done()
}

func GetCrawl2Img() {
// 初始化管道
chanImageUrls = make(chan string, 100)
chanTask = make(chan string, chanTaskCount)
start := time.Now()

for i := 2; i < chanTaskCount; i++ {
waitGroup.Add(1)
// 根据观察规则,发现下载图片地址网站
go getImgUrls("http://www.52desktop.cn/html/DLZM/KPBZ/20191205/15898_" + strconv.Itoa(i) + ".html")

}
// 任务统计个协程是否全部完成
waitGroup.Add(1)
go CheckOk()
// 创建一个新的协程来执行 Wait 后面的操作
go func() {
// 等待所有协程完成
waitGroup.Wait()

// 执行一些操作
fmt.Println("All workers have completed.")
}()
// 下载协程,从管道中读取链接下载
for i := 0; i < 5; i++ {
waitGroup.Add(1)
go DownloadImg()

}

waitGroup.Wait()
elapse := time.Since(start)
fmt.Println("elapsed time is : ", elapse, "s")

}


  • hello_work/main.go
1
2
3
4
5
6
7
8
9
10
package main

import (
"example.com/hello_work/hello_work/crawl"
)

func main() {
// crawl.GetCrawl1Img()
crawl.GetCrawl2Img()
}
  • 调用,下载了20张图片,共耗时7秒,大幅提升下载速度
1
2
3
4
5
6
PS E:\proj\gowork> go run .\hello_work\main.go
E:\proj\gowork\img\201912415221040677807.jpg download is success
E:\proj\gowork\img\2019124152210546778011.jpg download is success
All workers have completed.
elapsed time is : 7.2002013s s

image-20230620203609304

总结

  • 代码主要来自这里

  • 其中CheckOk代码中的count计算不正确,无法关闭close(chanImageUrls),导致waitGroup无法关闭,引起阻塞,本次代码中已经修复

mysql准备

  • 官网下载对应的zip包,我选择的(mysql-8.0.22-winx64.zip)

  • 在mysql-8.0.22-winx64文件夹下面新建一个my.ini文件和一个data文件夹

  • my.ini中的内容

    1
    2
    3
    4
    5
    6
    7
    8
    9
    10
    11
    12
    13
    14
    15
    16
    17
    18
    19
    20
    21
    22
    23
    24
    25
    26
    my.ini内容:

    [mysqld]
    # 设置3306端口
    port=3306
    # 设置mysql的安装目录
    basedir=E:\\app\\mysql-8.0.22-winx64
    # 设置mysql数据库的数据的存放目录
    datadir=E:\\app\\mysql-8.0.22-winx64\\data
    # 允许最大连接数
    max_connections=200
    # 允许连接失败的次数。这是为了防止有人从该主机试图攻击数据库系统
    max_connect_errors=10
    # 服务端使用的字符集默认为UTF8
    character-set-server=utf8
    # 创建新表时将使用的默认存储引擎
    default-storage-engine=INNODB
    [mysql]
    # 设置mysql客户端默认字符集
    default-character-set=utf8
    # 注意这里的配置,ONLY_FULL_GROUP_BY的报错问题
    sql_mode='STRICT_TRANS_TABLES,NO_ENGINE_SUBSTITUTION'
    [client]
    # 设置mysql客户端连接服务端时默认使用的端口
    port=3306
    default-character-set=utf8

    5.7后的版本,使用了group by分组后,select后的字段必须也要是分组的,不然报错ONLY_FULL_GROUP_BY,因此需要设置sql_mode

  • 我的电脑设置环境变量

    • MYSQL_HOME=e:\app\mysql-8.0.22-winx64
    • 在path中添加%MYSQL_HOME%\bin

mysql安装

  • 已管理员身份打开cmd,输入mysqld --initialize --user=mysql --console发现弹出没有vcruntime140_1.dll文件
  • vcruntime140_1.dll文件放到C:\Windows\System32C:\Windows\SysWOW64
  • 运行下面的bat文件,进行注册
    1
    2
    3
    4
    5
    6
    7
    8
    9
    @echo 开始注册
    copy vcruntime140_1.dll %windir%\system32\
    regsvr32 %windir%\system32\vcruntime140_1.dll /s
    @echo system32 vcruntime140_1.dll注册成功

    copy vcruntime140_1.dll %windir%\SysWOW64\
    regsvr32 %windir%\system32\vcruntime140_1.dll /s
    @echo SysWOW64 vcruntime140_1.dll注册成功
    @pause
  • 初始化数据库
    1
    2
    3
    4
    5
    6
    7
    8
    9
    10
    11
    12
    13
    14
    15
    E:\>mysqld --initialize --user=mysql --console
    2020-11-28T03:32:30.871296Z 0 [System] [MY-013169] [Server] E:\app\mysql-8.0.22-
    winx64\bin\mysqld.exe (mysqld 8.0.22) initializing of server in progress as proc
    ess 6964
    2020-11-28T03:32:30.873294Z 0 [Warning] [MY-013242] [Server] --character-set-ser
    ver: 'utf8' is currently an alias for the character set UTF8MB3, but will be an
    alias for UTF8MB4 in a future release. Please consider using UTF8MB4 in order to
    be unambiguous.
    2020-11-28T03:32:30.884295Z 1 [System] [MY-013576] [InnoDB] InnoDB initializatio
    n has started.
    2020-11-28T03:32:33.331435Z 1 [System] [MY-013577] [InnoDB] InnoDB initializatio
    n has ended.
    2020-11-28T03:32:35.760574Z 6 [Note] [MY-010454] [Server] A temporary password i
    s generated for root@localhost: JoyfjqHL5)SO

  • JoyfjqHL5)SO这个就是得到的数据库密码
  • 输入命令安装mysql
    1
    2
    E:\>mysqld install
    Service successfully installed.
  • 启动mysql服务
    1
    2
    3
    E:\>net start mysql
    MySQL 服务正在启动 .
    MySQL 服务已经启动成功
  • 登陆mysql,粘贴刚刚生成的密码
    1
    E:\>mysql -u root -p
  • 登陆成功后修改密码
    1
    ALTER USER 'root'@'localhost' IDENTIFIED WITH mysql_native_password BY '123456';
  • 刷新FLUSH PRIVILEGES;

mysql连接

  • 我这里使用heidisql
  • 新建会话,输入密码,打开下面页面就说明已经成功连接数据库
    image-20230612102438254

环境搭建

库表准备

  • 创建一个数据库
1
CREATE DATABASE Educational;
  • 创建学生表
1
2
3
4
5
6
7
8
9
10
use Educational 

CREATE TABLE student
(
ID CHAR(9) PRIMARY KEY, # PRIMARY KEY表示id为主键
name VARCHAR(10),
gender CHAR(6), # 性别
birthdate date # 出生年月
)

  • 创建课程表
1
2
3
4
5
6
7
8
9
10
11
12
13
14
15
CREATE TABLE course
(
# 课程号,主键
courseID CHAR(5) PRIMARY key,
# 课程名
coursename VARCHAR(36),
# 课程简介
Syllabus text,
# 课时
hours INT,
# 学分
credit TINYINT,
# 开课学期
semester text
);
  • 创建一个成绩表,将学生表和课程表进行关联
1
2
3
4
5
6
7
8
9
10
CREATE TABLE Score 
(
# 学号,关联学生表中id,作为外键
ID CHAR(9) REFERENCES student(ID),
# 课程号.关联课程表中id,作为外键
courseID CHAR(5) REFERENCES course(CourseID),
# 成绩
Results DECIMAL(4,1) CHECK(results BETWEEN 0 AND 100)

)
  • 插入数据,学生表
1
2
3
4
5
6
7
INSERT INTO student VALUES('202201001','汤姆猫','男','2000-01-01');
INSERT INTO student VALUES('202201002','风火轮','男','1998-11-03');
INSERT INTO student VALUES('202201003','闪光弹','女','2000-08-21');
INSERT INTO student VALUES('202201004','降世拳','女','2010-04-11');
INSERT INTO student VALUES('202201005','流星腿','女','2010-09-23');
INSERT INTO student VALUES('202201006','闪闪光','女','2010-02-02');
INSERT INTO student VALUES('202201007','汤汤水','女','1999-03-29');

image-20230612112157798

  • 插入数据,课程表
1
2
3
4
5
6
INSERT INTO course VALUES('10001','英语', '英语简介介绍',28,20,'2023-07-01');
INSERT INTO course VALUES('10002','数学', '英语简介介绍',32,17,'2023-07-01');
INSERT INTO course VALUES('10003','语文', '语文简介介绍',29,25,'2023-07-01');
INSERT INTO course VALUES('10004','物理', '物理简介介绍',21,20,'2023-08-05')
INSERT INTO course VALUES('10005','媒体', '摄像媒体简介介绍',13,12,'2023-08-01');
INSERT INTO course VALUES('10006','java', 'java简介介绍',17,5,'2023-08-11')
  • 插入数据,成绩表
1
2
3
4
5
6
7
8
9
10
11
12
13
14
15
16
17
18
19
20
21
22
23
24
25
26
27
28
29
30
31
32
33
34
35
INSERT INTO Score VALUES('202201001','10001',89);
INSERT INTO Score VALUES('202201002','10001',76);
INSERT INTO Score VALUES('202201003','10001',99);
INSERT INTO Score VALUES('202201004','10001',88);
INSERT INTO Score VALUES('202201005','10001',59);
INSERT INTO Score VALUES('202201006','10001',69);

INSERT INTO Score VALUES('202201001','10002',80);
INSERT INTO Score VALUES('202201002','10002',77);
INSERT INTO Score VALUES('202201003','10002',92);
INSERT INTO Score VALUES('202201004','10002',83);
INSERT INTO Score VALUES('202201005','10002',56);
INSERT INTO Score VALUES('202201006','10002',100);

INSERT INTO Score VALUES('202201001','10003',81);
INSERT INTO Score VALUES('202201002','10003',72);
INSERT INTO Score VALUES('202201003','10003',63);
INSERT INTO Score VALUES('202201004','10003',81);
INSERT INTO Score VALUES('202201005','10003',55);
INSERT INTO Score VALUES('202201006','10003',93);

INSERT INTO Score VALUES('202201001','10004',82);
INSERT INTO Score VALUES('202201002','10004',71);
INSERT INTO Score VALUES('202201003','10004',96);
INSERT INTO Score VALUES('202201004','10004',75);
INSERT INTO Score VALUES('202201005','10004',58);
INSERT INTO Score VALUES('202201006','10004',89);

INSERT INTO Score VALUES('202201001','10005',91);
INSERT INTO Score VALUES('202201002','10005',86);
INSERT INTO Score VALUES('202201003','10005',97);
INSERT INTO Score VALUES('202201004','10005',38);
INSERT INTO Score VALUES('202201005','10005',61);
INSERT INTO Score VALUES('202201006','10005',18);

查询

  • 基础语法
1
2
3
4
5
6
7
select 查询列表
from 表1 别名,表2 别名
where 表1.key=表2.key
【and 筛选条件】
【group by 分组字段】
【having 分组后的筛选】
【order by 排序字段】
  • 关于group by 分组的理解

    • 合并数据,比如张三有两条数据分别为100,20,合并后就成了120
    • 在使用聚合函数,如sum,avg等需要分组,比如张三有对应两条数据为10和20,李四对应两条数据为10和10,使用avg 求平均值时

    不分组

    1
    2
    3
    4
    5
    6
    select name,avg(num),count(1) from table 
    # 若不分组就是整张表的平均值,即:(10+20+10+10)/4=12.5
    # count(1),则是统计表中数据行,上述计算出为4
    # 而这里的name则是读取表中一条数据,张三

    张三 12.5 4

    分组

    1
    2
    3
    4
    5
    select name,avg(num),count(1) from table group name
    # 首先对张三、李四进行分组,各自的数据为10+20=30、10+10=20
    # 然后对分组后的数据进行平均计算,30/2=15、10/2=10
    张三 15 2
    李四 10 2

实践

  • 不及格的学生姓名,性别,科目,分数
1
SELECT student.name, student.gender,course.coursename, score.Results FROM score, student,course WHERE score.ID=student.ID AND score.courseID=course.courseID and Results <=60

image-20230614154352090

  • 查询所有学生共参加了几门考试的信息,并且分数大于80,一定要分组,不分组就是查询的共有多少人参加了考试
1
SELECT student.ID,student.name,COUNT(1) FROM student,score WHERE student.ID = score.ID AND score.Results>80 GROUP BY student.ID

image-20230614154417658

  • 计算当前学生所有成绩的总分,使用的左连接
1
SELECT student.name,sum(score.Results),COUNT(1) FROM score LEFT JOIN student on score.ID=student.ID GROUP BY student.ID

image-20230614154453362

  • 计算当前学生所有成绩的总分大于300的信息,分组后,使用having sum
1
2
SELECT student.name,sum(score.Results),COUNT(1) FROM score LEFT JOIN student on score.ID=student.ID GROUP BY student.ID HAVING SUM(score.Results)>90

image-20230614154545101

  • 查询当前分数最高的学生名字、科目。注意这里and results= 使用了子查询
1
SELECT student.name,course.coursename,results from course,score, student WHERE course.courseID=score.courseID AND student.ID=score.ID and results=(SELECT MAX(score.Results) FROM score)

image-20230614160341440

  • 查询各个科目的平均成绩
1
select course.coursename,avg(score.Results),COUNT(1) FROM course  JOIN score ON course.courseID = score.courseID GROUP BY course.courseID

image-20230614160434587

  • 查询某个学生共参加了几门考试
1
2
SELECT student.name,count(score.Results) FROM student,score WHERE student.name="汤姆猫" AND student.ID=score.ID

  • 查看学生成绩总分为前三的数据。先对学生进行分组,然后用sum计算所有分数,然后取前3条数据
1
SELECT stu.name, sum(sc.Results) FROM student stu ,score sc WHERE sc.ID=stu.ID GROUP BY stu.ID ORDER BY sum(sc.Results) DESC LIMIT 3

image-20230614160553477

  • 查询各科成绩前三的学生信息,这个自己写不出来,用chatgpt写的
1
2
3
4
5
6
7
8
9
10
11
SELECT s.name AS student_name, c.coursename AS course_name, sc.Results AS course_score
FROM score sc
JOIN student s ON sc.ID = s.ID -- 连接score表和student表,获取学生姓名
JOIN course c ON sc.courseID = c.courseID -- 连接score表和course表,获取课程名称
WHERE (
SELECT COUNT(DISTINCT Results) -- 查询比当前成绩高的不同分数的数量
FROM score sc2
WHERE sc2.courseID = sc.courseID AND sc2.Results > sc.Results
) < 3 -- 只保留比当前成绩高的不同分数小于3个的记录,即前三名
ORDER BY c.coursename, sc.Results DESC; -- 按照课程名称和成绩降序排序

image-20230614173746372

  • 查询所有课程最高分数的学生信息,用查询各科成绩前三的语句,把<3给为<1即可