运行pytest的三种方式
1 | import pytest |
方式一
1 | pytest.main(["-s", "pt_test1.py"]) |
方式二
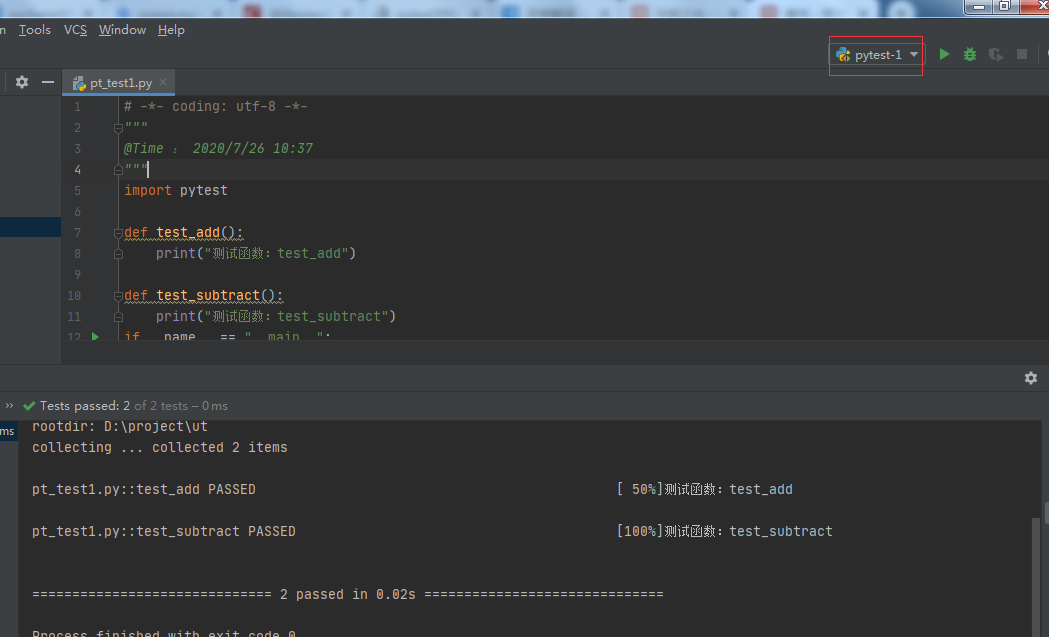
在pycharm中新建pytest

点击运行即可
使用命令执行
1
2
3
4
5
6
7
8
9D:\project\ut>pytest pt_test1.py
======================================================================= test session starts ========================================================================
platform win32 -- Python 3.6.6, pytest-5.4.3, py-1.9.0, pluggy-0.13.1
rootdir: D:\project\ut
collected 2 items
pt_test1.py .. [100%]
======================================================================== 2 passed in 0.02s =========================================================================
测试制定的函数
::制定测试函数1
2
3pytest pt_test1.py::test_add
pytest.main(["pt_test1.py::test_add"])-k模糊搜索,模糊搜索add的测试函数1
2pytest -k add pt_test1.py
pytest.main(["-s", "pt_test1.py", "-k", "add"])- 使用
pytest.mark标注后,使用-m参数1
2
3
4
5@pytest.mark.finished
def test_add():
print("测试函数:test_add")
pytest -m finished pt_test1.py - 一个函数可以打多个标记;多个函数也可以打相同的标记,运行逻辑:
pytest -m "finished and commit"
跳过测试
pytest.mark.skip1
2
3
4
5
6# test_skip.py
@pytest.mark.skip(reason='out-of-date api')
def test_connect():
pass
pytest tests/test-function/test_skip.pypytest.mark.skipif为测试函数指定被忽略的条件1
2
3
4
5
6@pytest.mark.skipif(conn.__version__ < '0.2.0',
reason='not supported until v0.2.0')
def test_api():
pass
pytest tests/test-function/test_skip.py
参数化
- 密码长度的测试函数
1
2
3
4
5
6
7
8
9
10
11
12
13
14
15
16
17
18# test_parametrize.py
@pytest.mark.parametrize('passwd',
['123456',
'abcdefdfs',
'as52345fasdf4'])
def test_passwd_length(passwd):
assert len(passwd) >= 8
$ pytest tests/test-function/test_parametrize.py
============================= test session starts =============================
platform win32 -- Python 3.6.4, pytest-3.6.1, py-1.5.2, pluggy-0.6.0
rootdir: F:\self-repo\learning-pytest, inifile:
collected 3 items
tests\test-function\test_parametrize.py F.. [100%]
================================== FAILURES =================================== - 再看一个多参数的例子,用于校验用户密码:
1
2
3
4
5
6
7
8
9
10
11
12
13
14
15
16
17
18
19
20
21
22
23
24
25
26# test_parametrize.py
@pytest.mark.parametrize('user, passwd',
[('jack', 'abcdefgh'),
('tom', 'a123456a')])
def test_passwd_md5(user, passwd):
db = {
'jack': 'e8dc4081b13434b45189a720b77b6818',
'tom': '1702a132e769a623c1adb78353fc9503'
}
import hashlib
assert hashlib.md5(passwd.encode()).hexdigest() == db[user]
$ pytest -v tests/test-function/test_parametrize.py::test_passwd_md5_id
============================= test session starts =============================
platform win32 -- Python 3.6.4, pytest-3.6.1, py-1.5.2, pluggy-0.6.0 -- c:\anaconda3\python.exe
cachedir: .pytest_cache
rootdir: F:\self-repo\learning-pytest, inifile:
collected 2 items
tests/test-function/test_parametrize.py::test_passwd_md5_id[User<Jack>] PASSED [ 50%]
tests/test-function/test_parametrize.py::test_passwd_md5_id[User<Tom>] PASSED [100%]
========================== 2 passed in 0.07 seconds ===========================
固件
- 固件(
Fixture)是一些函数,pytest会在执行测试函数之前(或之后)加载运行它们
-Pytest使用pytest.fixture()定义固件,下面是最简单的固件,只返回北京邮编1
2
3
4
5
6
7
8
@pytest.fixture()
def postcode():
return '010'
def test_postcode(postcode):
assert postcode == '010'
预处理和后处理
- 很多时候需要在测试前进行预处理(如新建数据库连接),并在测试完成进行清理(关闭数据库连接)。
Pytest使用yield关键词将固件分为两部分,yield 之前的代码属于预处理,会在测试前执行;yield 之后的代码属于后处理,将在测试完成后执行
1 | # test_db.py |
作用域
在定义固件时,通过 scope 参数声明作用域,可选项有:
function: 函数级,每个测试函数都会执行一次固件;默认的作用域为 functionclass: 类级别,每个测试类执行一次,所有方法都可以使用;module: 模块级,每个模块执行一次,模块内函数和方法都可使用;session: 会话级,一次测试只执行一次,所有被找到的函数和方法都可用。1
2
3
4
5
6
7
8
9
10
11
12
13
14
15
16
17
18@pytest.fixture(scope='function')
def func_scope():
pass
@pytest.fixture(scope='module')
def mod_scope():
pass
@pytest.fixture(scope='session')
def sess_scope():
pass
@pytest.fixture(scope='class')
def class_scope():
pass- 对于类使用作用域,需要使用 pytest.mark.usefixtures (对函数和方法也适用):
1
2
3
4
5
6
7
8
9
10
11
12
13
14
15
16
17
18
19
20
21# test_scope.py
@pytest.mark.usefixtures('class_scope')
class TestClassScope:
def test_1(self):
pass
def test_2(self):
pass
$ pytest --setup-show tests/fixture/test_scope.py::TestClassScope
============================= test session starts =============================
platform win32 -- Python 3.6.4, pytest-3.6.1, py-1.5.2, pluggy-0.6.0
rootdir: F:\self-repo\learning-pytest, inifile:
collected 2 items
tests\fixture\test_scope.py
SETUP C class_scope
tests/fixture/test_scope.py::TestClassScope::()::test_1 (fixtures used: class_scope).
tests/fixture/test_scope.py::TestClassScope::()::test_2 (fixtures used: class_scope).
TEARDOWN C class_scope
使用命令行在pytest中传递多个参数
- 配置conftest.py
1
2
3
4
5
6
7
8
9
10
11
12
13# conftest.py
import pytest
def pytest_addoption(parser):
parser.addoption("--input1", action="store", default="default input1")
parser.addoption("--input2", action="store", default="default input2")
@pytest.fixture
def input1(request):
return request.config.getoption("--input1")
@pytest.fixture
def input2(request):
return request.config.getoption("--input2") - 编写测函数
1
2
3
4
5
6
7# test.py
import pytest
@pytest.mark.unit
def test_print_name(input1, input2):
print ("Displaying input1: %s" % input1)
print("Displaying input2: %s" % input2) - 执行命令
1
2
3
4
5
6
7
8
9
10
11>py.test -s test.py --input1 tt --input2 12
================================================= test session starts =================================================
platform win32 -- Python 3.7.0, pytest-4.1.1, py-1.7.0, pluggy-0.8.1
rootdir: pytest, inifile:
collected 1 item
test.py Displaying input1: tt
Displaying input2: 12
.
============================================== 1 passed in 0.04 seconds ====================================
其他的一些参数总结
-v, --verbose
详细结果
--q, --quiet
极简结果显示,简化控制台的输出,可以看出输出信息和之前不添加-q不信息不一样, 下图中有两个..点代替了pass结果
--s
输入我们用例中的调式信息,比如print的打印信息等,我们在用例中加上一句 print(driver.title),我们再运行一下我们的用例看看,调试信息输出
--V
可以输出用例更加详细的执行信息,比如用例所在的文件及用例名称等--junit-xml=path
输出xml文件格式,在与jenkins做集成时使用--result-log=path
将最后的结果保存到本地文件中
本文来自
兼容unittest中的setup
- 使用
setup,setup_cass,teardown_class1
2
3
4
5
6
7
8
9
10
11
12
13
14
15
16
17
18
19
20
21
22
23
24
25
26
27class TestCase():
def setup(self):
print("setup: 每个用例开始前执行")
def teardown(self):
print("teardown: 每个用例结束后执行")
def setup_class(self):
print("setup_class:所有用例执行之前")
def teardown_class(self):
print("teardown_class:所有用例执行之前")
def setup_method(self):
print("setup_method: 每个用例开始前执行")
def teardown_method(self):
print("teardown_method: 每个用例结束后执行")
def test_one(self):
print("正在执行----test_one")
x = "this"
assert 'h' in x
def test_three(self):
print("正在执行test_two")
a = "hello"
b = "hello word"
assert a in b
def add(self,a, b):
print("这是加减法")
return a + b
if __name__ == '__main__':
pytest.main(['-s', 'test_fixt_class']) - 来自https://www.cnblogs.com/tallme/p/11369791.html
conftest
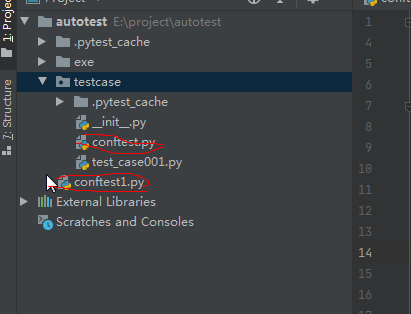
- 多用例的数据可以共,比如selenium中的driver的
- conftest.py文件名字不能更改
- conftest.py与运行的用例要在同一个pakage下,并且有__init__.py文件
- 如下图,我可以放到和用例testcase同级文件夹目录,也可以放到testcase文件夹下面的用例目录
- 代码
1
2
3
4
5
6
7
8
9
10
11
12
13
14
15
16
17
18
19
20
21
22
23
24
25
26
27
28
29
30# conftest.py
import pytest
from selenium import webdriver
import os
@pytest.fixture()
def driver():
PATH = lambda p: os.path.abspath(
os.path.join(os.path.dirname(__file__), p)
)
driver_path = PATH("../exe/chromedriver.exe")
driver = webdriver.Chrome(driver_path)
driver.get('https://www.baidu.com')
driver.maximize_window()
# 返回数据
yield driver
# 实现用例后置
driver.quit()
import pytest
# test_case001.pu
class TestClassName:
@pytest.mark.usefixtures("driver")
def test_func_name(self, driver):
driver.find_element_by_id("kw").click() - 执行:
pytest -s testcase/
共享session
在selenium中,可以实现driver共享,不用每个用例都重新打开和关闭浏览器
1 | # conftest.py |
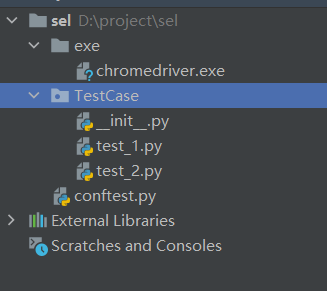
批量执行z
1 | pytest -s TestCase\ |
单例模式
单例是一种设计模式,应用该模式的类只会生成一个实例,单例模式保证了在程序的不同位置都可以且仅可以取到同一个对象实例:如果实例不存在,会创建一个实例;如果已存在就会返回这个实例
单例函数
1 | # coding:utf-8 |
- selenium 的driver只有一个单例实例:
GetSeleniumDriver.py
1 | # -*- coding:utf-8 -*- |
- 编写用例
1 | # test_3.py |
1 | # test_4.py |
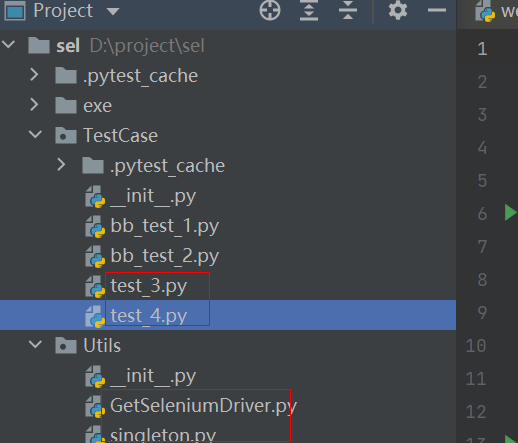
- 代码结构
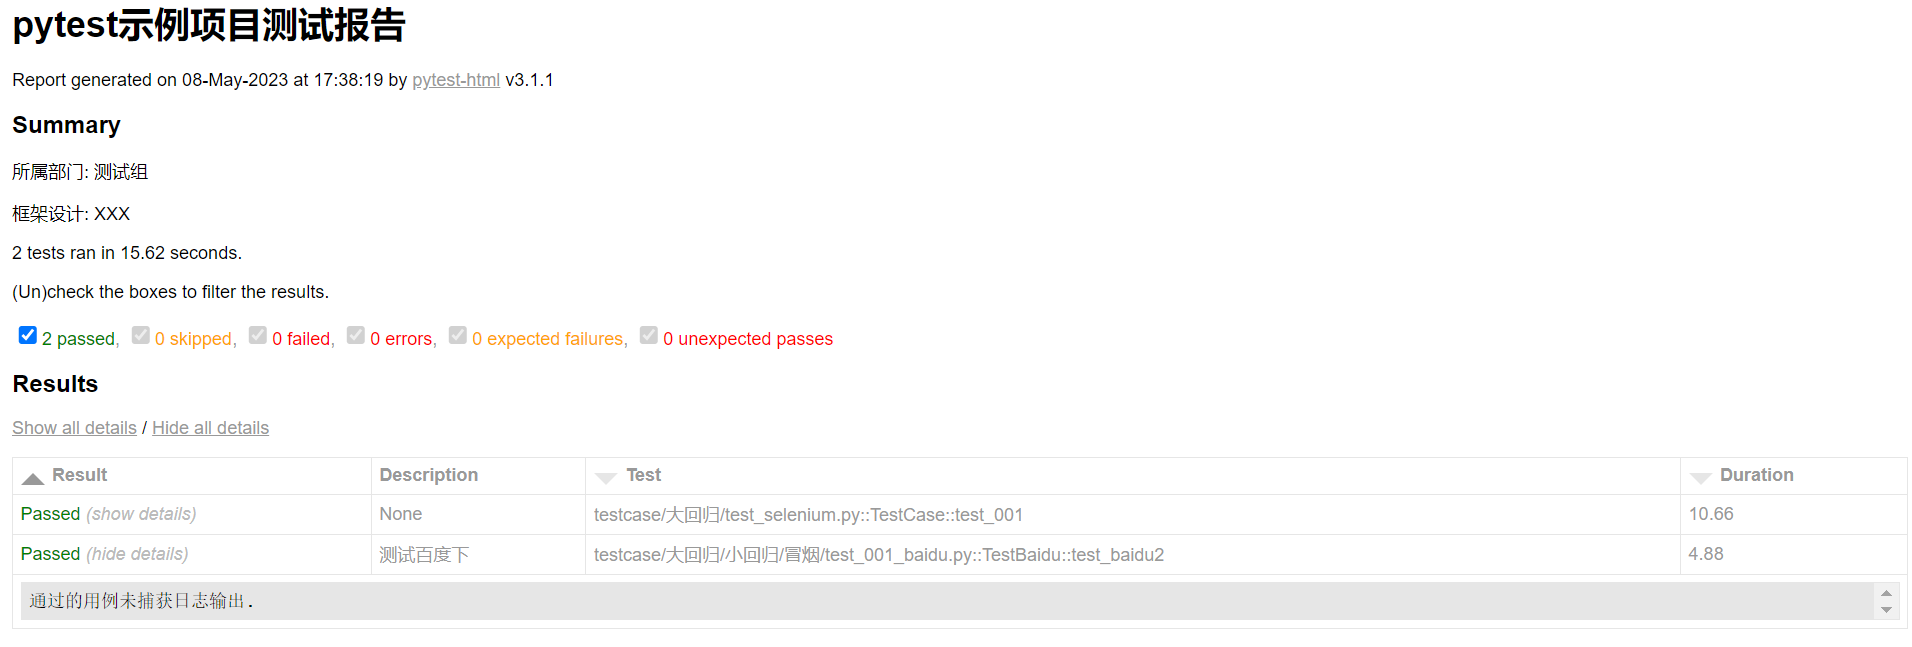
html美化
在conftest.py中的优化的代码
1 | import time |
- 编写用例,用例下面的注释:测试百度作为报告中的标题
1 | @pytest.mark.finished |
- 执行结果
1 | pytest -m finished webAuto\testcase --html=report.html --self-contained-html --capture=sys |