项目搭建
- node.js 安装16.0以上的版本
1 | C:\Users\Administrator>node -v |
- vite初始化Vue3项目
1 | D:\project>npm init vite-app vue3Demo |
项目结构分析
- 这里的项目目录结构分析主要是main.js文件
- Vue2里面的main.js
1 | new Vue({ |
- Vue3里面的main.js
1 | import { createApp } from 'vue' |
在Vue2里面,通过new Vue({})构造函数创建应用实例对象,而Vue3引入的不再是Vue的构造函数,引入的是一个名为createApp的工厂函数创建应用实例对象。
Composition API
setp
setup是所有Composition API(组合式API)的入口,组件中所用到的数据、方法等等,均要配置在setup里面
组件中所用到的数据、方法等等,均要配置在setup里面
setup的执行时机
- 在beforeCreate之前执行一次,此时this为undefined
setup函数的两种返回值
- 若返回一个对象,则对象中的属性、方法,在模板中均可以直接使用
- 若返回一个渲染函数,则可以自定义渲染内容
setup的参数
- props:值为对象,包含:组件外部传递过来,且组件内部声明接收了的属性
- context:上下文对象,接收参数 context 内部函数props接受的自定义属性
- attrs:值为对象,包含:组件外部传递过来,但没有在props配置中声明的属性,相当于this.$attrs
- slots:收到的插槽内容,相当于this.$slots
- emit:分发自定义事件的函数,相当于this.$emit
注意事项:
尽量不要与Vue2x的配置使用
- Vue2x的配置(data、methods、computed)均可以访问到setup中的属性、方法
- setup中不能访问Vue2x的配置(data、methods、computed)
- 如果data里面的属性和setup里面的属性有重名,则setup优先
返回值
示例一:setup函数的两种返回值
- 安装路由依赖
1 | npm install vue-router@4 --save |
src\router\routers.js手动新建自定义路由
1 | const routes = [ |
src\router\index.js 对外暴露路由
1 | import { createRouter, createWebHistory } from "vue-router" |
- src-main.js内容引用路由
1 | import { createApp } from 'vue' |
- 编写src-components-views-home.vue
1 | <template> |
这里需要注意的是setup里面定义的属性和方法均要return出去,否则无法使用
- 启动测试
1 | npm run dev |
示例二:setup里面的参数和方法和配置项混合使用
1 | <template> |
- 这段代码是先实现了setup里面的属性和方法,以及Vue2中配置项里面的属性和方法。接下来添加对应的混合方法
1 | <template> |
测试Vue3setup里面调用Vue2里面的属性和方法时,this.sex无数据
Vue2里面props和slot的使用
讲解setup这里面的两个参数之前,先回顾一下Vue2里面的相关知识
- props和自定义事件的使用
- attrs
- slot(插槽)
示例一:Vue2props和自定义事件的使用
准备两个组件,分别为parent.vue组件和child.vue组件
1 | <template> |
- child
1 | <template> |
总结
- 子组件通过props接收父组件传递的信息,通过this.$emit()自定义事件向父组件传递信息。当使用props接收数据的时候,attrs里面的数据为空,如果没有使用props接收数据的话,那么props里面就有值。
Vue2里面slot的使用
这两个分类栏里的数据都不一样,但是整体结构是一样的,这就要求组件的结构一样,但是内部 DOM 结构是由使用组件的时候决定的,这就需要插槽
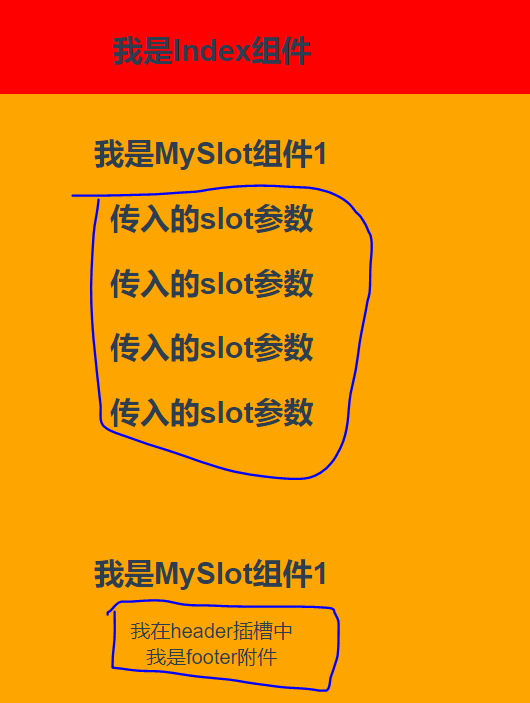
同理准备两个组件,一个Index.vue组件,另一个为MySlot.vue组件
Index.vue
1
2
3
4
5
6
7
8
9
10
11
12
13
14
15
16
17
18
19
20
21
22
23
24
25
26
27
28
29
30
31
32
33
34
35
36
37
38
39<template>
<div class="index">
<h2>我是Index组件</h2>
<!--写法一-->
<my-slot>
<!--插槽里面的内容-->
<h2>传入的slot参数</h2>
<h2>传入的slot参数</h2>
<h2>传入的slot参数</h2>
<h2>传入的slot参数</h2>
</my-slot>
<!--写法二-->
<my-slot>
<div slot="header">
<span>我在header插槽中</span>
</div>
<div slot="header">
<span>我是footer附件</span>
</div>
</my-slot>
</div>
</template>
<script>
import MySlot from "./MySlot.vue";
export default {
name: "Index",
components: {MySlot}
}
</script>
<style scoped>
.index{
padding: 10px;
background: red;
}
</style>MySlot
1 | <template> |
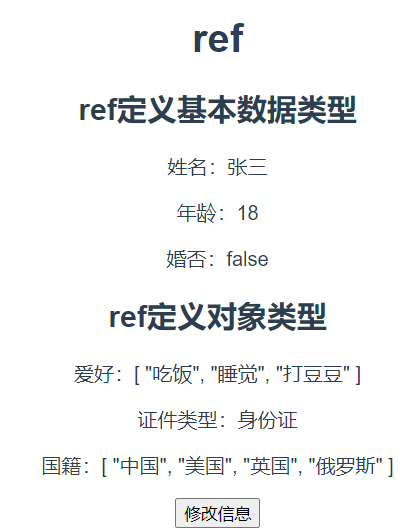
ref
作用:ref( ) 接受一个内部值,返回一个ref 对象,这个对象是响应式的、可更改的,且只有一个指向其内部值的属性 .value。
语法:
const xxx=ref(initValue)创建一个包含响应式数据的引用对象(reference对象);
JS中操作数据:xxx.value=xxx,模板中读取数据:不需要.value,直接:
{{xxx}}备注:
接收的数据可以是:基本类型,也可以是对象类型
基本类型的数据:响应式依然是靠Object.defineProperty()的get和set完成的
对象类型的数据:内部求助了Vue3.0中的一个新函数-reactive函数
测试代码
1 | <template> |
点击修改信息数据变化
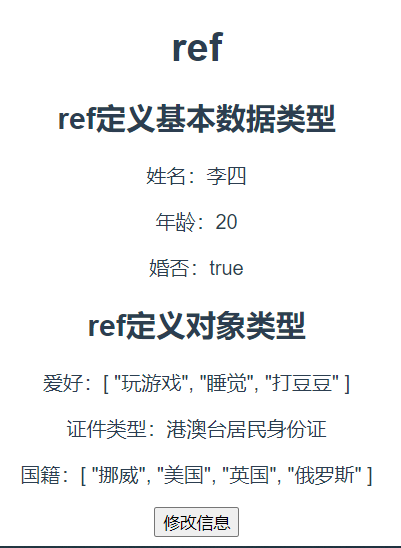
- ref定义的响应式数据修改数据时必需要.value
- ref定义的对象数据类型,内部求助了Vue3.0中的一个新函数-reactive函数(看下面的介绍)
- 模板中使用数据时不需要.value
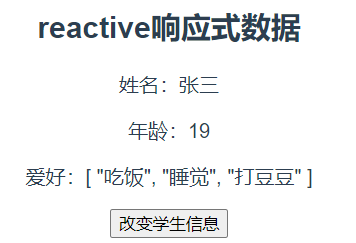
reactive
作用:定义一个对象类型的响应式数据(基本类型别用它,用ref函数)
const 代理对象=reactive(被代理的对象)接收一个对象(或数组),返回一个代理器对象(Proxy的实例对象,简称Proxy对象)
reactive定义的响应式数据是深层次的
内部基于ES6的Proxy实现,通过代理对象的操作源对象的内部数据都是响应式的
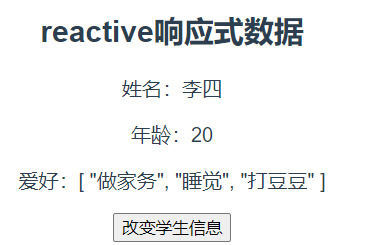
1 | <template> |
- 点击改变学生信息后
reactive对比ref
从定义数据的角度对比
- ref用来定义:基本类型数据
- reactive用来定义:对象(或数组)类型数据
- 备注:ref也可以用来定义对象(或数组)类型的数据,它内部会自动通过reactive转为代理对象
从原理角度对比
- ref通过Object.defineProperty()的get和set实现(响应式)数据劫持
- reactive通过使用Proxy来实现响应式(数据劫持),并通过Reflect操作源对象内部的数据
从使用角度
- ref定义的数据:操作数据需要.value,读取数据时模板中直接读取不需要.value
- reactive定义的数据:操作数据与读取数据均不需要.value
watch和watchEffect
1 | // attr表示需要监视的属性 |
watch
监视reactive定义的响应式数据时:oldValue无法正确获取、强制开启了深度监视(deep配置失效)
监视reactive定义的响应式数据中某个属性时deep配置有效
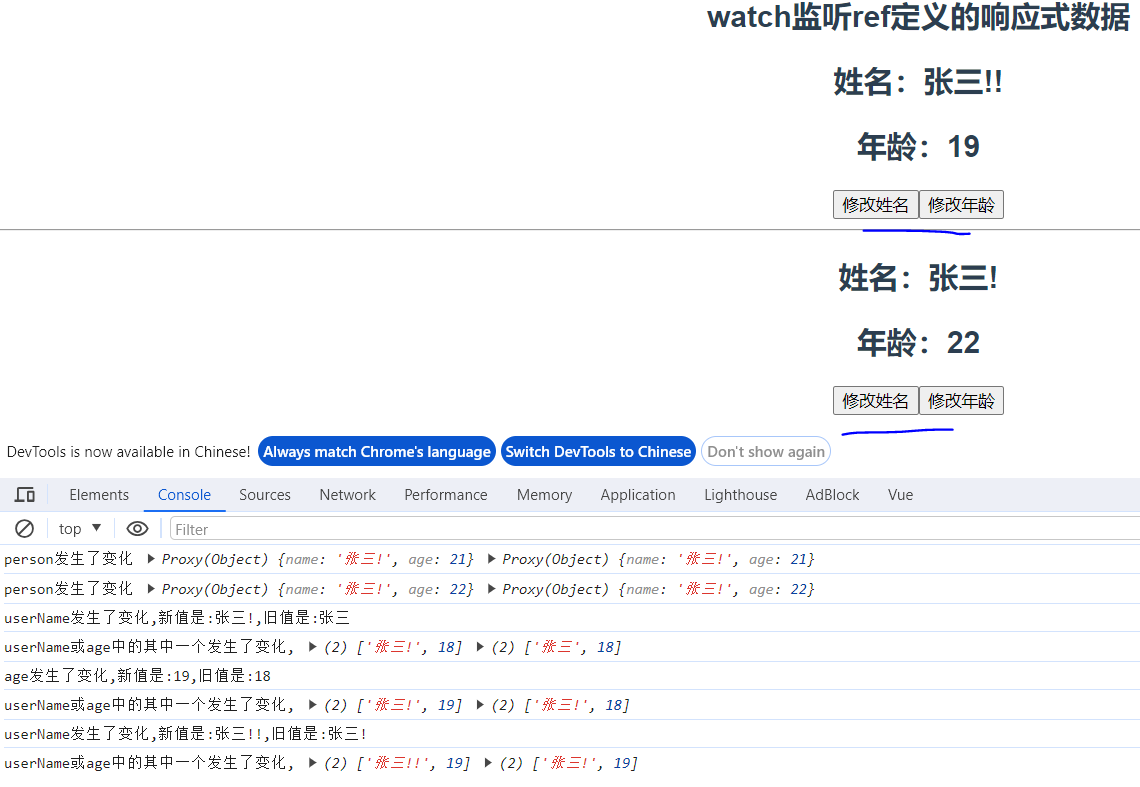
示例一:wath监听ref定义的响应式数据
1 | <template> |

- 点击修改按钮
示例二:watch监听reactive定义的响应式数据
1 | <template> |
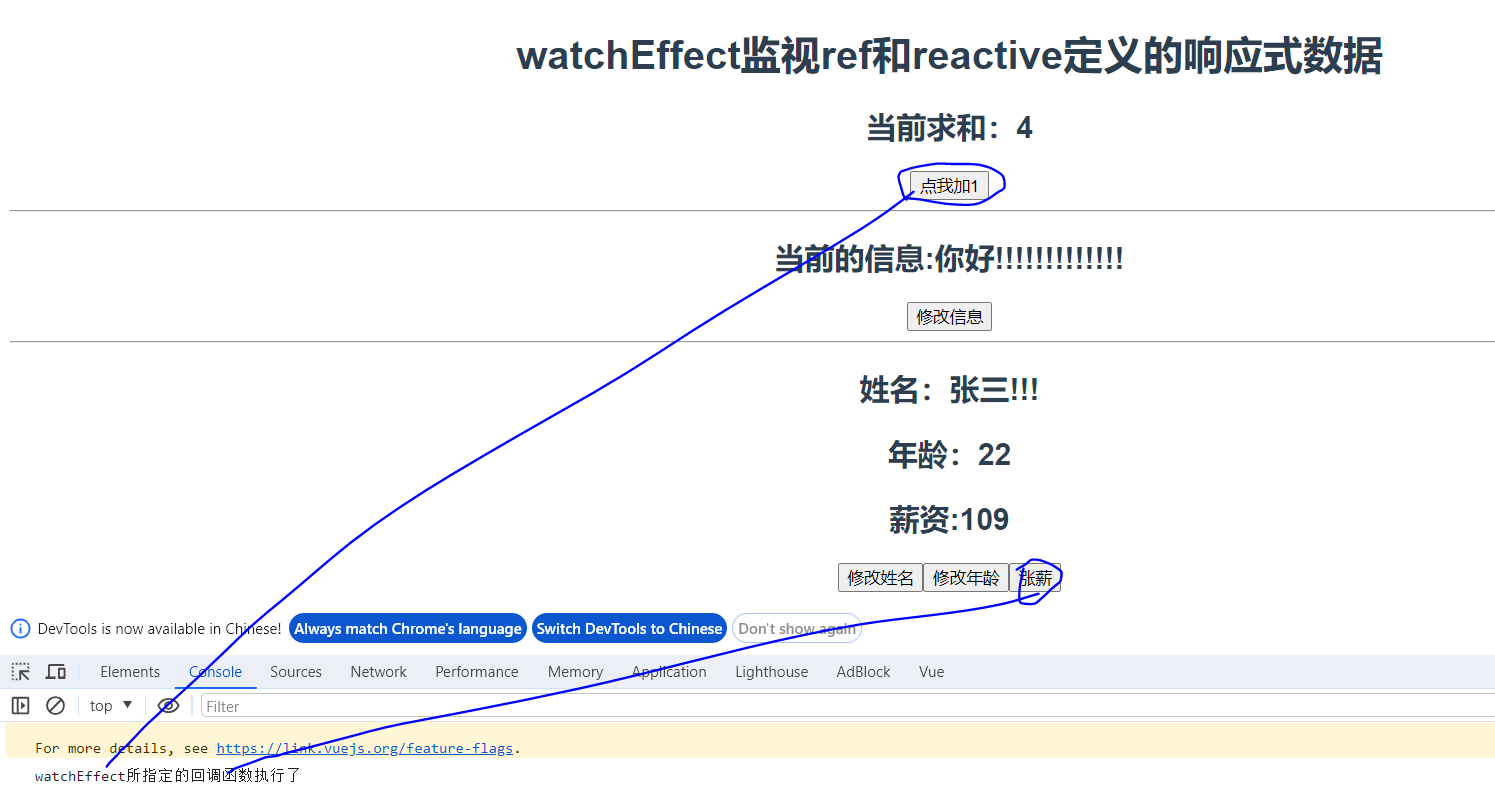
watchEffect
watch的套路是:既要指明监视的属性,也要指明监视的回调
watchEffect的套路是:不用指明监视那个属性,监视的回调中用到那个属性,那就监视那个属性
watchEffect有点像computed
但computed注重的是计算出来的值(回调函数的返回值),所以必需要写返回值
而watchEffect更注重的是过程(回调函数的函数体),所以不用写返回值
代码
1 | <template> |
- 点我加1和涨薪,就会触发watchEffect监控中的内容